
Including the heat and character of panorama lighting to your house’s exterior
is just not as laborious advert you suppose! I promise it isn’t a troublesome DIY mission.
It’s extremely straightforward to put in your individual landscaping lights. There may be zero work
with electrical energy aside from plugging it in. You solely need to do
One in all my favourite pastimes (particularly in the summertime) is driving
via fairly neighborhoods at nightfall and looking out on the homes. I believe
houses look prettiest presently of day.
There’s at all times one stunning element of costly homes that I discover —
all of them have panorama lighting that makes the exteriors glow at night time. It
makes every little thing look much more beautiful and costly.
So years in the past I discovered learn how to do it by myself and it’s so straightforward
to do!
You could have an outdoor electrical outlet close to the place you wish to set up
the lights. Have in mind you’ll have a wire, so it will probably’t go over a
sidewalk or driveway. You may conceal the wire alongside the home and on this
tutorial I take advantage of them in mulch.
There are solely three stuff you’ll want to put in the lights – the
lights themselves, an influence pack and wire.
This tutorial contains photographs from each our outdated and present home. I really like
including this lighting accent to our exterior!
1. Decide your panorama lighting.
photo voltaic lights which have come a good distance, and for those who decide these you may cease
right here. 😉
For this tutorial you’ll wish to head towards the low voltage
lights:
This put up could include affiliate hyperlinks for
your comfort.
I’ll earn a small fee when you make a purchase order via hyperlinks.
Store round!
There are SO many panorama lighting choices:
-
Path lights that direct the sunshine downward for security alongside a
walkway. - Deck lights will be wired in deck stairs or railings.
-
Up/spot lights for bushes and greater bushes, or perhaps a flag on the
home or within the yard. - Flood lights for laundry the home exterior with mild.
- Properly lights for gentle ambient lighting in backyard beds.
One factor to contemplate — I believe too many lights decreases the customized
look that these add, so don’t go overboard. You can begin with a couple of and
then add extra for those who do not feel it is sufficient.
I picked out some extra flood lights for this mission:

This is where I will tell you this is not always a cheap project. 😬
(Keep in mind the prices in these photos are most likely higher now.)
But once you make the investment, the upkeep is minimal since these low
wattage fixtures last forever. You can usually find sets of the lights
(instead of individual) to lower the price just a bit.
Consider what you’ll be lighting up! I use flood or spot lights to
highlight something pretty, like a tree. They are also great for washing the
front of your house with light.

2. Work out the facility pack and wiring you may want.
That is the place you establish the following step — the facility pack dimension you’ll
want. I had three path lights that have been 11 watts every. The flood lights have been
20 watts every, and since I wasn’t positive what number of I used to be going to make use of, I simply
rounded as much as all six to determine the facility pack I wanted.
So…
11watts + 11watts + 11watts + 20watts + 20watts + 20watts + 20watts +
20watts + 20watts =153 watts
Subsequently I went with a 200 watt energy pack:

I at all times wish to get an influence pack that may maintain greater than I believe I am going to
want, simply in case I add extra fixtures later.
OK, you’ve bought your lights and your energy pack. Now you have to work out
the wire you’ll want. They arrive in numerous gauges that may work for decrease
wattages (only a few lights) as much as larger wattage (extra lights).


The price goes down with the decrease energy pack wattage and with the
decrease wire capability.
The GREAT factor is you may keep away from figuring all this out all this math and
simply purchase
a landscape lighting kit has every little thing you’ll want in it — the sunshine fixtures, energy unit
and wire. SO handy.
But if you want to mix up your lighting like I did (or you want more
lights), you may want to buy everything individually.
You just have to screw a few parts together to assemble the lights:

3. Work out your panorama mild structure.
Step one is determining the place you wish to place the fixtures.
Needless to say up or flood lights work greatest to focus on bushes or the
aspect of a home:

You probably have giant bushes or vegetation like we do, I like to recommend inserting your
lights nearer to the home to allow them to shine up via the vegetation and fill
the realm with mild:

These flood lights was once out within the mulch in entrance of the bushes. However
as a result of the vegetation have grown SO a lot, not a lot mild was reaching the
home.
Once you’re good with the placement, seize your wire. Lay it out from the place it
might be plugged into the facility pack to the final mild in your
panorama.
I give myself a bit give between lights so I can transfer them round a
little bit if wanted.
**Do not lower the wire till you are fully positive of the place you need
the entire fixtures.
4. Join your fixtures to the wire.
That is the enjoyable half. 🙂 Keep in mind NOTHING is plugged in until
the final step. You aren’t coping with reside wires that may damage you. It’s
extra harmful to plug in a lamp. 😉
Every mild has a bit connector. You’ll unscrew the underside a part of
it:

You see these sharp steel prongs? These are what pierce into the wire when
you screw every little thing again collectively.
Then run the wire via that backside half after which screw the connector again
collectively:

Make sure that your wire lays flat within the plastic base and in addition you’ll want to screw
it collectively fairly tight, in any other case your mild gained’t join:

This retains moisture out as nicely. (Mine is about midway screwed in right here.)
Hold happening your wire and join every mild. Once you get to the top
the place your lights might be plugged in, you’ll get to the ultimate step. That is
the one half that includes working with the wires.
5. Join the wire to the facility pack.
wire cutter
or scissors to chop the top of the wire that may connect to the facility
pack:

After which use the cutter to separate the wire in half (it has a groove down
the center). You’ll have to separate the 2 wires about two inches.
Shut the cutter on the wire after which twist it forwards and backwards so it cuts
the protecting wire rubber insulation:

Use the wire cutter to strip about 1/2 to three/4 inch off the top of the 2
wires. Most cutters have the wire gauges marked on them, so for those who
have a 16 gauge wire, you may place it the place the 16 is famous on the
cutter.
Pull the top of the insulation off, then twist these wires collectively:

Don’t twist the 2 wires collectively – twist the strands of every
one.
Seize your energy pack and switch it over. Take away the screws and place the wires
into every part the place the screws go in like so:

As you may see right here, this energy pack has spots for 2 units of wire to be
plugged into it. So so long as they equal to 200 watts or much less, you could possibly
have one set of landscaping lights going one route out of your outlet, and
one other set going the opposite route.
That is very useful for those who solely have one outlet as a result of you may run a line
of lights on one aspect after which the opposite of the outlet field.
Hold this in thoughts whenever you decide your energy unit! Should you plan to make use of two
units of panorama lights, you may wish to make sure that your energy pack has
sufficient wattage.
Set up the screws once more, ensuring to tighten them onto the uncovered
wires:

You’re nearly finished!
finish with
electrical tape.
I’ve forgotten to do that a couple of occasions and so they maintain up nice, even within the
rain. However now I at all times cowl the lower finish of the wire so there is not any fear of
the lights shorting out.
NOW you are finished! Simply plug in your energy pack and switch it on:

The ability pack has an choice to maintain them on on a regular basis, on for one to
9 hours or to activate robotically when the solar goes down. I take advantage of the
auto setting.
After it is plugged in, you may modify the location of your lights a bit.
The connectors offer you a little bit of room to play with.
I LOVE it how these add to the look of a house’s exterior:
It seems to be SO good!:

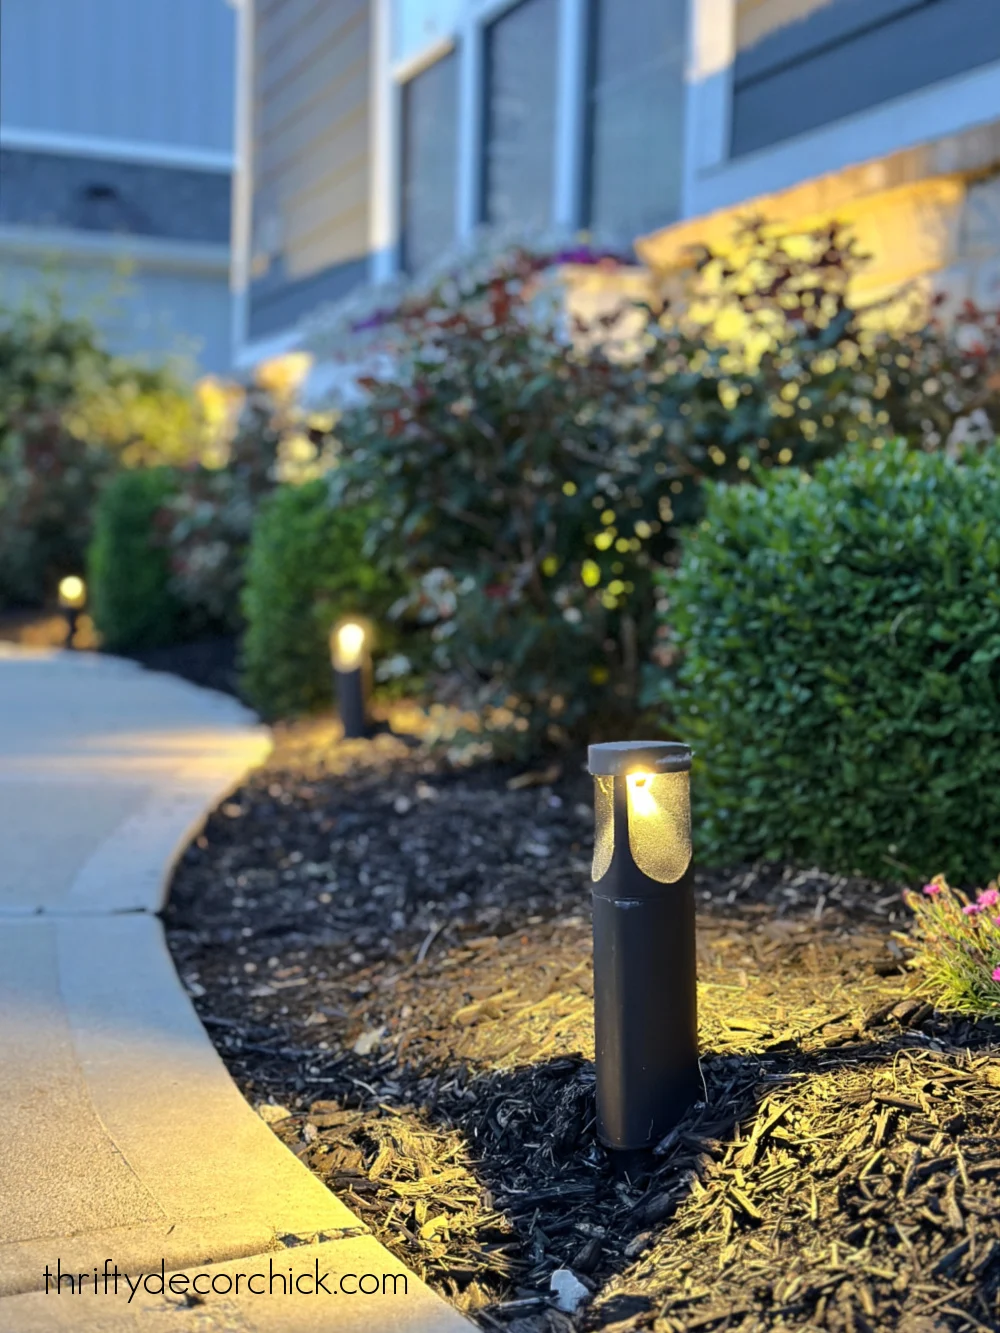
I used a extra fashionable pathway mild on the sidewalk at our present
home. The down mild provides some security to our entrance walkway, and appears
nice!:

I forgot so as to add that after you’re fully finished, you’ll wish to cowl your
wire with mulch. It is supreme to do that earlier than you add a contemporary layer of
mulch, however not crucial.
I like to recommend plugging in your lights at nightfall so you may see how they
look. You may transfer them round as wanted.

I hope this tutorial helps these of you who’re fascinated with tackling this
by yourself. It’s actually one of many best do-it-yourself tasks. Please
don’t be intimidated by the wires!
Landscaping lights make a home look so fairly at night time, and so they’re good
added safety too.
Let me know when you’ve got any questions or if I didn’t handle something you’re
questioning about.
Right here’s a straightforward picture to make use of for those who’d wish to pin this mission for later.
(Hover over picture and click on the button on the higher left.):

Trending Merchandise


