
Find out how to make the softest material pumpkin pillows and not using a stitching
machine.
It is coming…lastly! I can really feel it — fall is on the way in which! 🎃
These cute stuffed pumpkins are SO mushy and can look nice in your fall
decor, or would work as cute pillows on chairs or sofas. It is easy to make
material pumpkins and no stitching machine or expertise is required.
They’re a straightforward knock off of the costly Pottery Barn teddy bear pumpkin
pillows. 🙂 Once I first noticed these cute stuffed pumpkins, I knew I had
to make a few of my very own.
I ended up making a bunch of them for the worth of ONE from the shop. This
is after I actually love DIY!
This submit could comprise affiliate hyperlinks for
your comfort.
I’ll earn a small fee when you make a purchase order via hyperlinks.
However the value…nope. A minimum of after I knew I might recreate them for
a fraction of what they’re charging.
I went to the craft retailer in quest of the softest, fluffiest material I might
discover. I obtained three colours in very related materials — one gentle cream, one
medium brown and one darkish brown.
They’re all SO SOFT and comfy. I simply beloved all three. The darkish material is
what I feel is taken into account the true “teddy bear” material, however all of them labored
superbly for this venture.
I’ve by no means made my very own material pumpkins, however I figured it out alongside the way in which.
My first technique labored OK, however then I did a little analysis and will likely be
sharing the directions I ended up utilizing for the remainder of the
pumpkins.
This DIY material pumpkin how-to will work with each the fluffy materials I am
utilizing and thinner choices for cotton or velvet pumpkins.
First up, minimize a rounded sq. or circle out of your material within the dimension you
need:
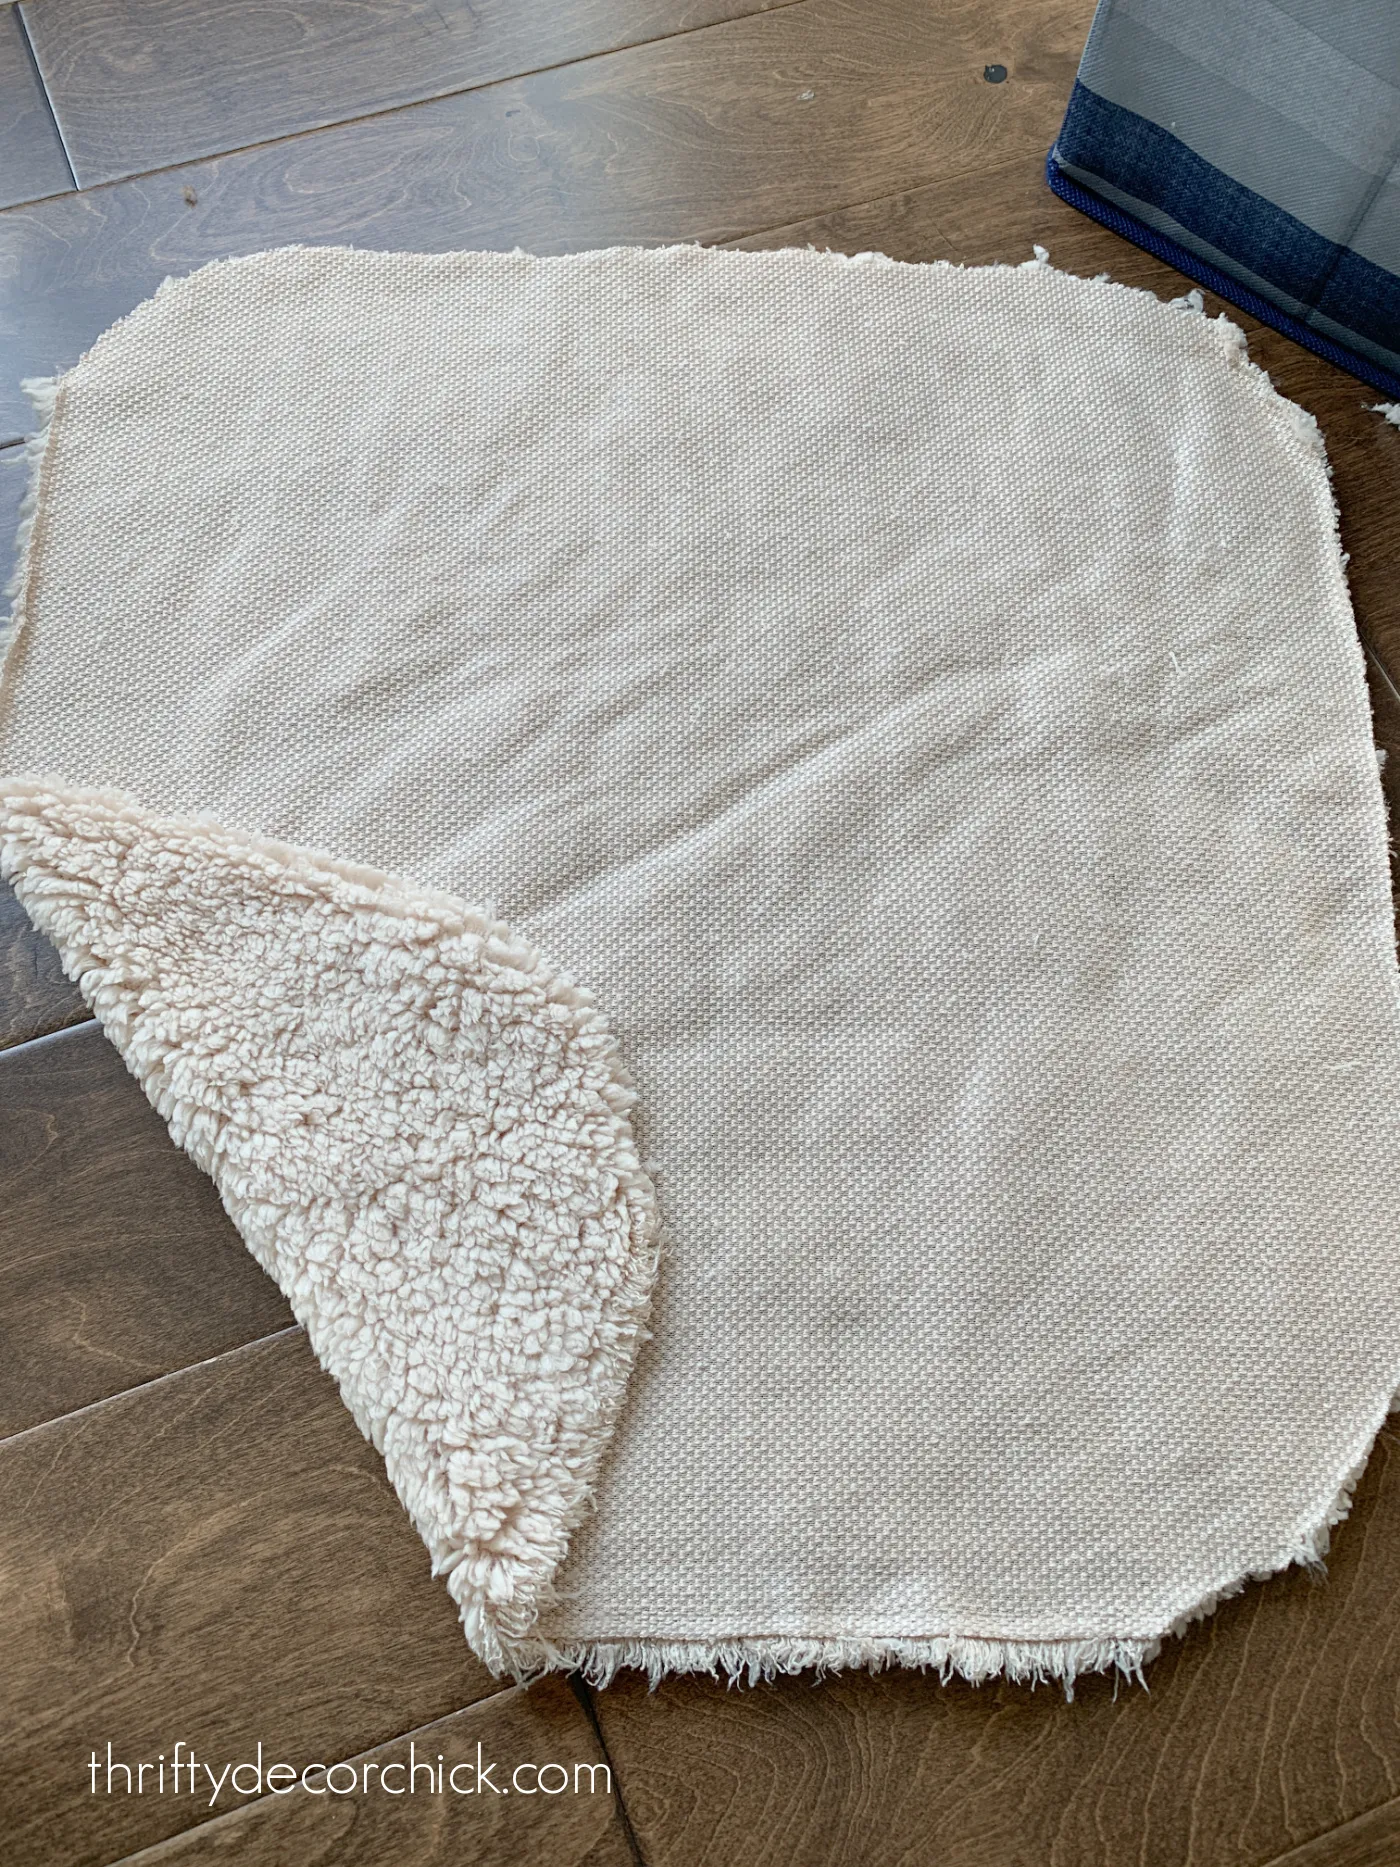
The width of your material will depend upon the dimensions you need on your pumpkin.
I made my giant pumpkin with a dimension about 16-18 inches throughout.
fabric scissors
in the event you work on initiatives like this usually — they make it manner simpler to
minimize, particularly fluffy stuff like this!
It seems you actually haven’t got to chop down your material corners — I
discovered it really labored tremendous to go away it a sq. form. The corners assist
fill within the center half the place your stem will go later.
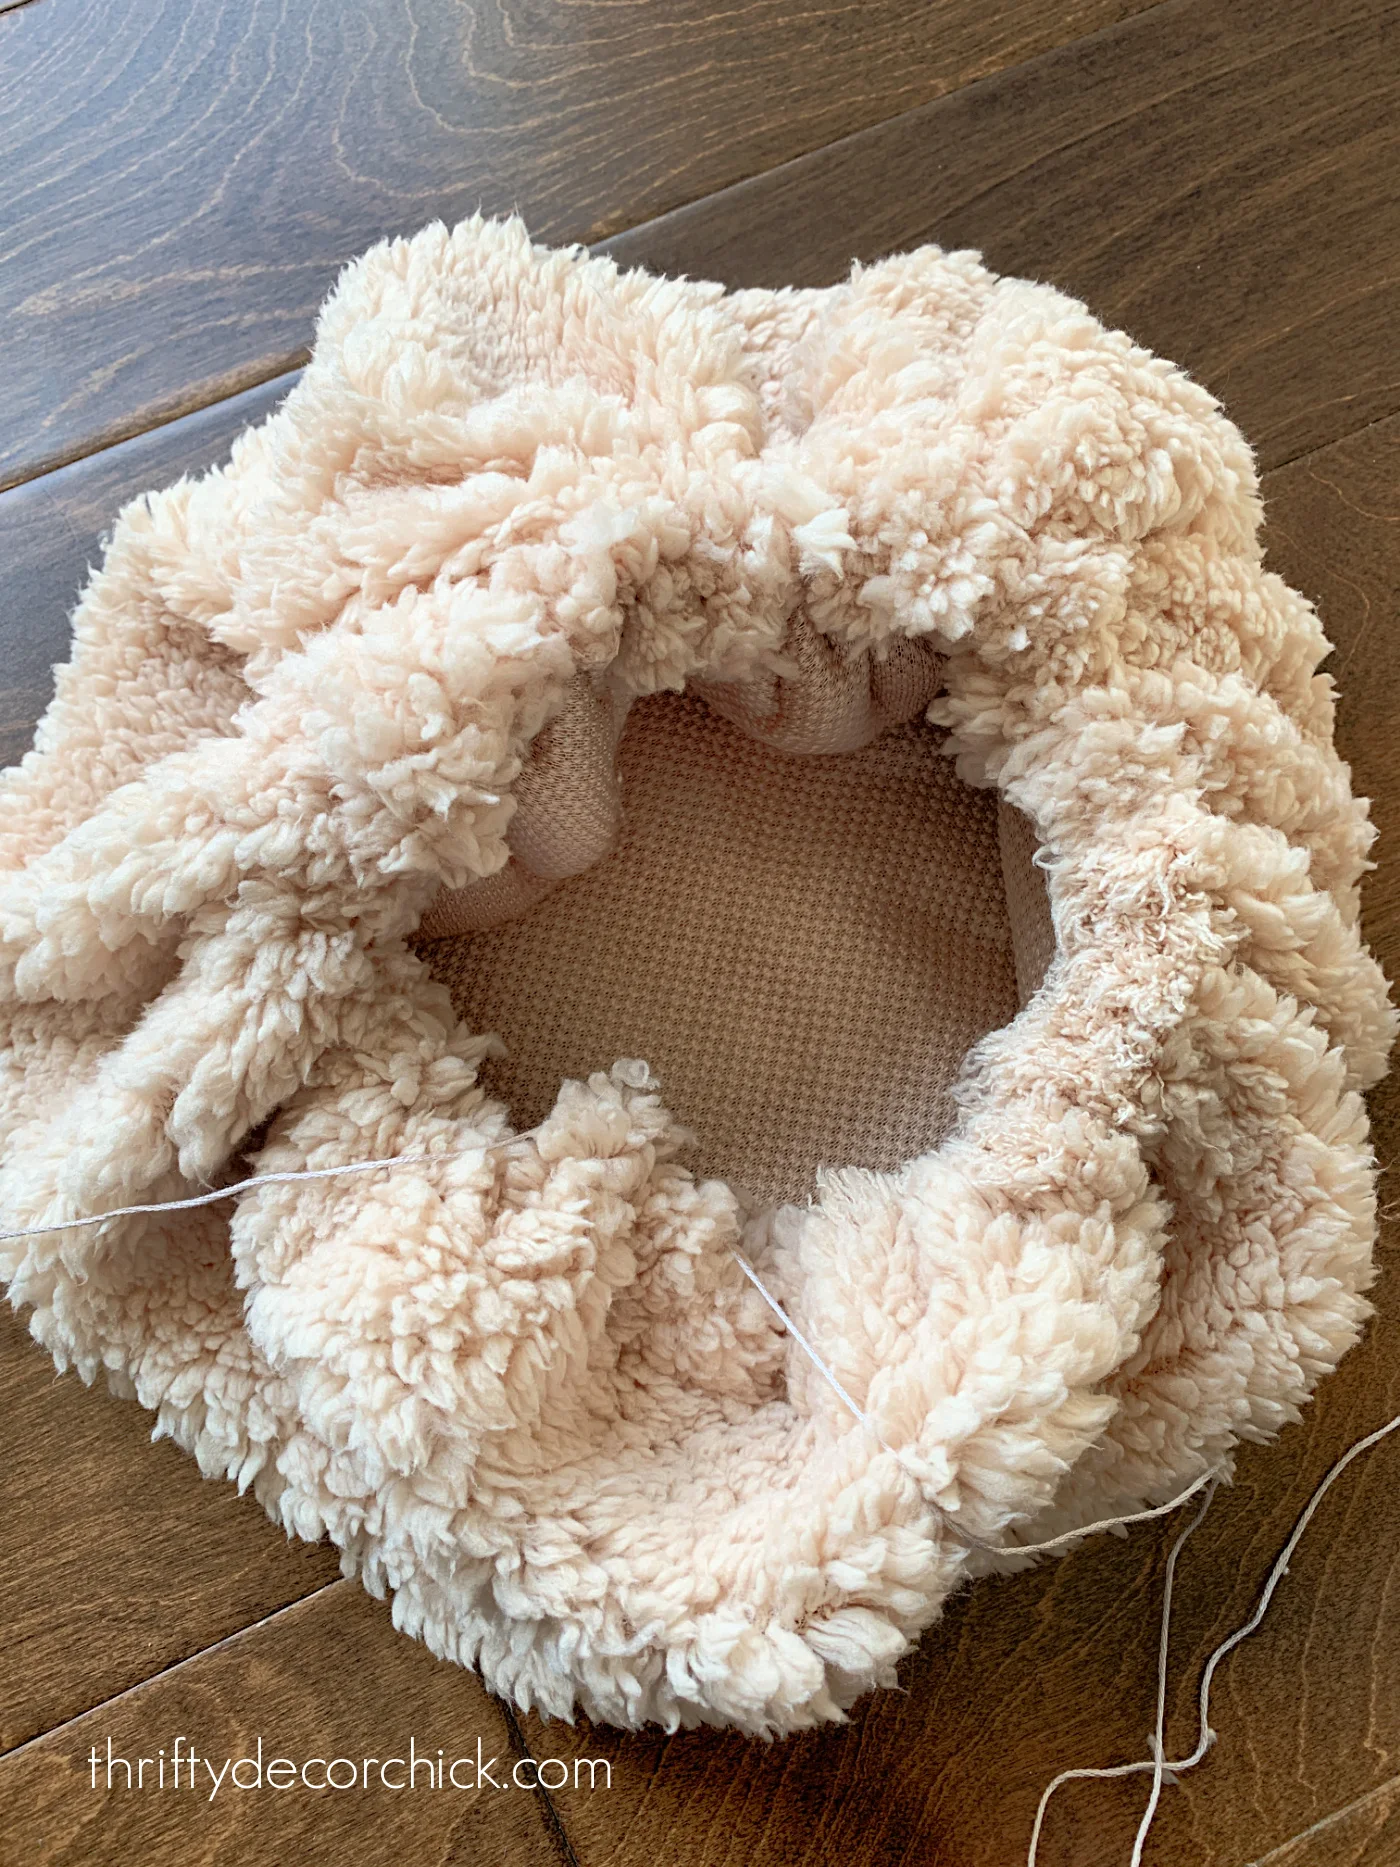
On my first strive, I simply merely gathered all the material on the high,
wrapped it with twine to safe after which minimize off of the surplus.
I used to be left with this half:

I flipped it over and added my “stem” on the high. It was just a little troublesome
to wrangle all the material collectively and tie it, and the stem wasn’t
secured nicely after I was completed.
So I switched to this technique, which was very easy with this material.

This goes tremendous quick and I promise you need not know any stitching
expertise to do that. Simply weave it out and in loosely like I did
above.
It would not must be good — you will not even see the thread if you’re
completed!
As soon as you’ve got obtained it across the circumference of the material, you’ll be able to take every
finish of the embroidery thread and pull them collectively to start out closing the
pumpkin like so:
fiber fill. I used about two and a half one pound luggage to do 9 stuffed
pumpkins.
Fiber fill from outdated pillows or pillow inserts works nice for this as
nicely!
I all the time advocate pulling the fill aside a couple of instances to fluff it up earlier than
inserting:
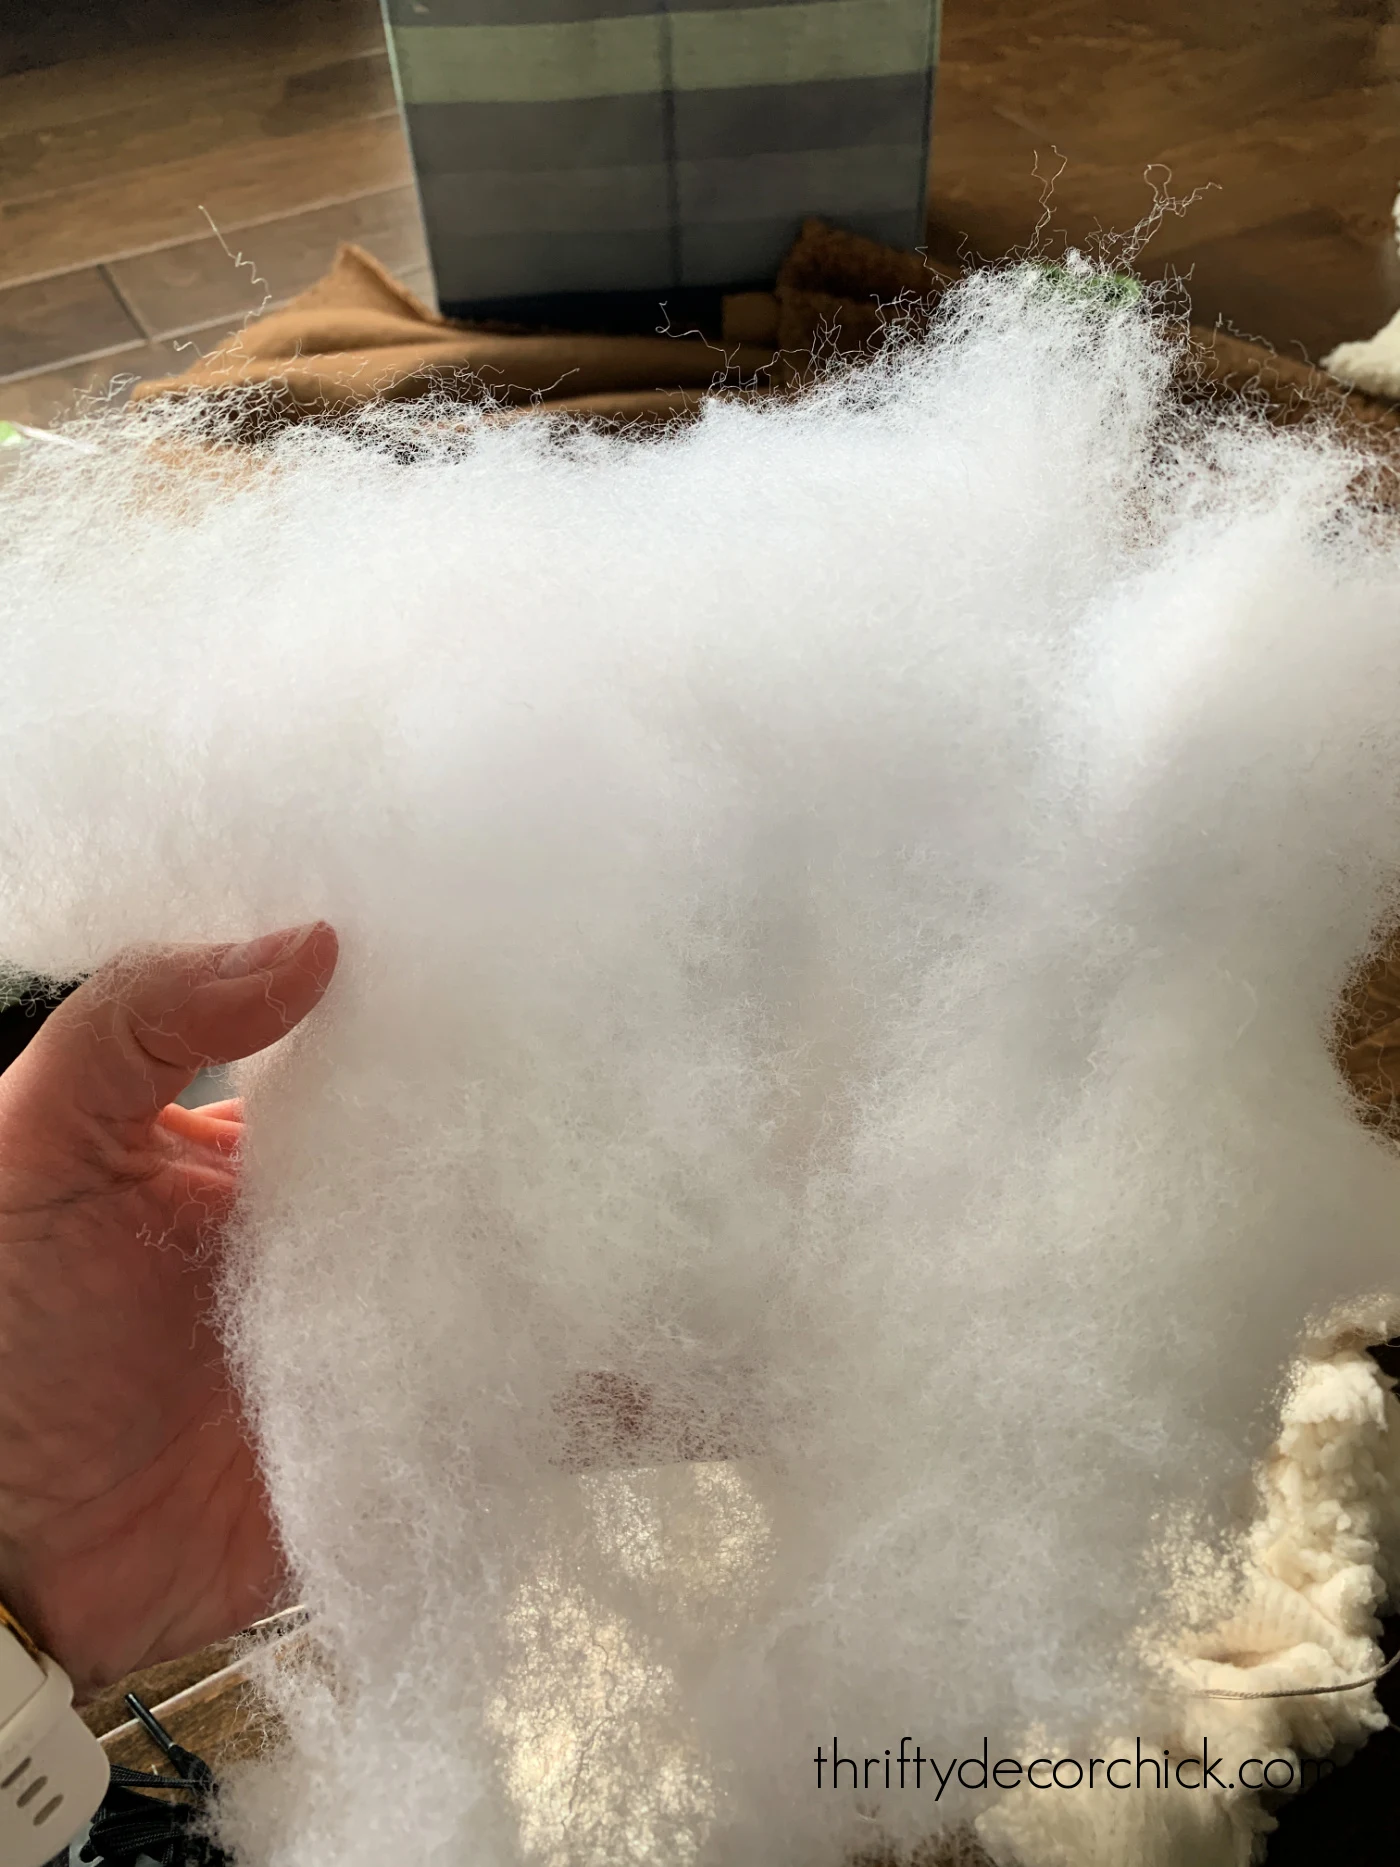
It’ll go rather a lot additional in the event you do that first!
I do not advocate stuffing it utterly full at this level, because it’s more durable
to shut if overstuffed. You will need to add some further stuffing to fill
up components later.
As soon as you’ve got obtained it stuffed as much as your liking (pull your thread collectively at
the highest to see how full it’s), you’ll be able to tie it up, however go away some some house
on your stem and for just a little closing stuffing!
At this level you’ll be able to add your stem and be completed if you’d like — the “pillow”
could have a form that already resembles a pumpkin.
However I needed the outlined sections just like the inspiration pillows, and I feel
they simply look extra like an actual pumpkin anyway. 🙂
jute twine
and began on the high by the opening for the stem, then wrapped the twine
tightly across the pumpkin again to the highest.
Here is a view of the underside of the pumpkin so you’ll be able to see how I used to be wrapping
the twine round:
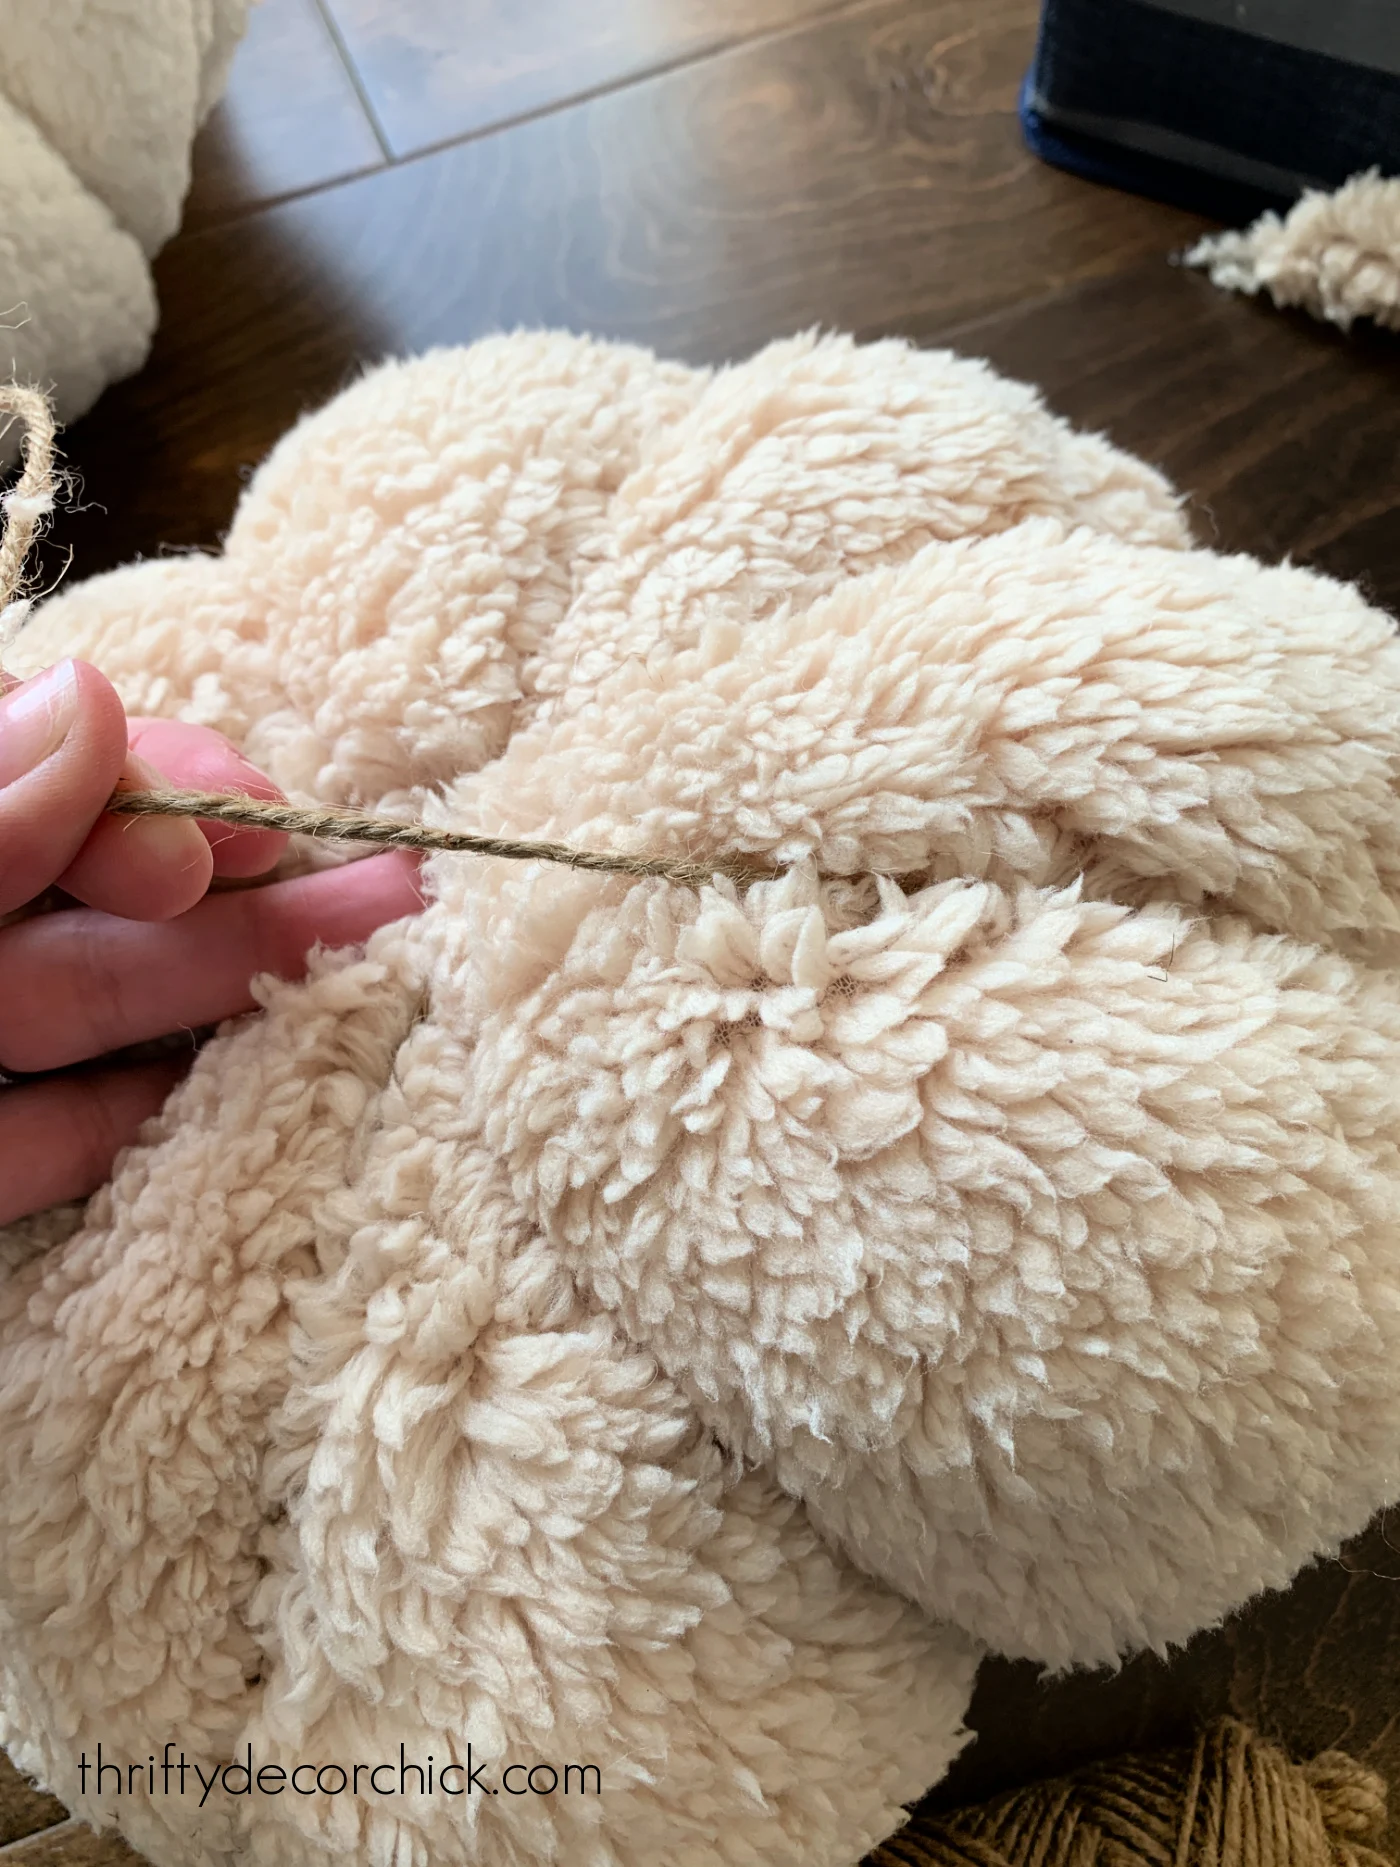
Go away some extra twine on the high which you can tie every move across the
pumpkin to.
Every time you wrap the pumpkin, tie it off in a knot on high of the pumpkin
to maintain the jute as tight as doable:

I’d wrap with twine, knot it on the high to safe, then take the twine
round in one other course, knot, and repeat till I had all of the “sections”
I needed.
You will be left with a gap which you can nonetheless match a stem into:

By the way in which, I’ve no clue if that is the way it’s “supposed” to be completed. I used to be
winging this for essentially the most half. 🙂 However it labored nicely and went quick!
Earlier than you add the stem, you may need to fluff up the pumpkin a bit extra.
Take extra fiber fill and tuck it inside and up into to high of the pillow to
fill in any flat components. The fluffier the higher!
For the stem you should utilize absolutely anything that resembles the form. Lower
branches from exterior would work with none further steps.
trunk of my DIY olive tree.
I minimize them down after which wrapped with jute utilizing my sizzling glue gun:
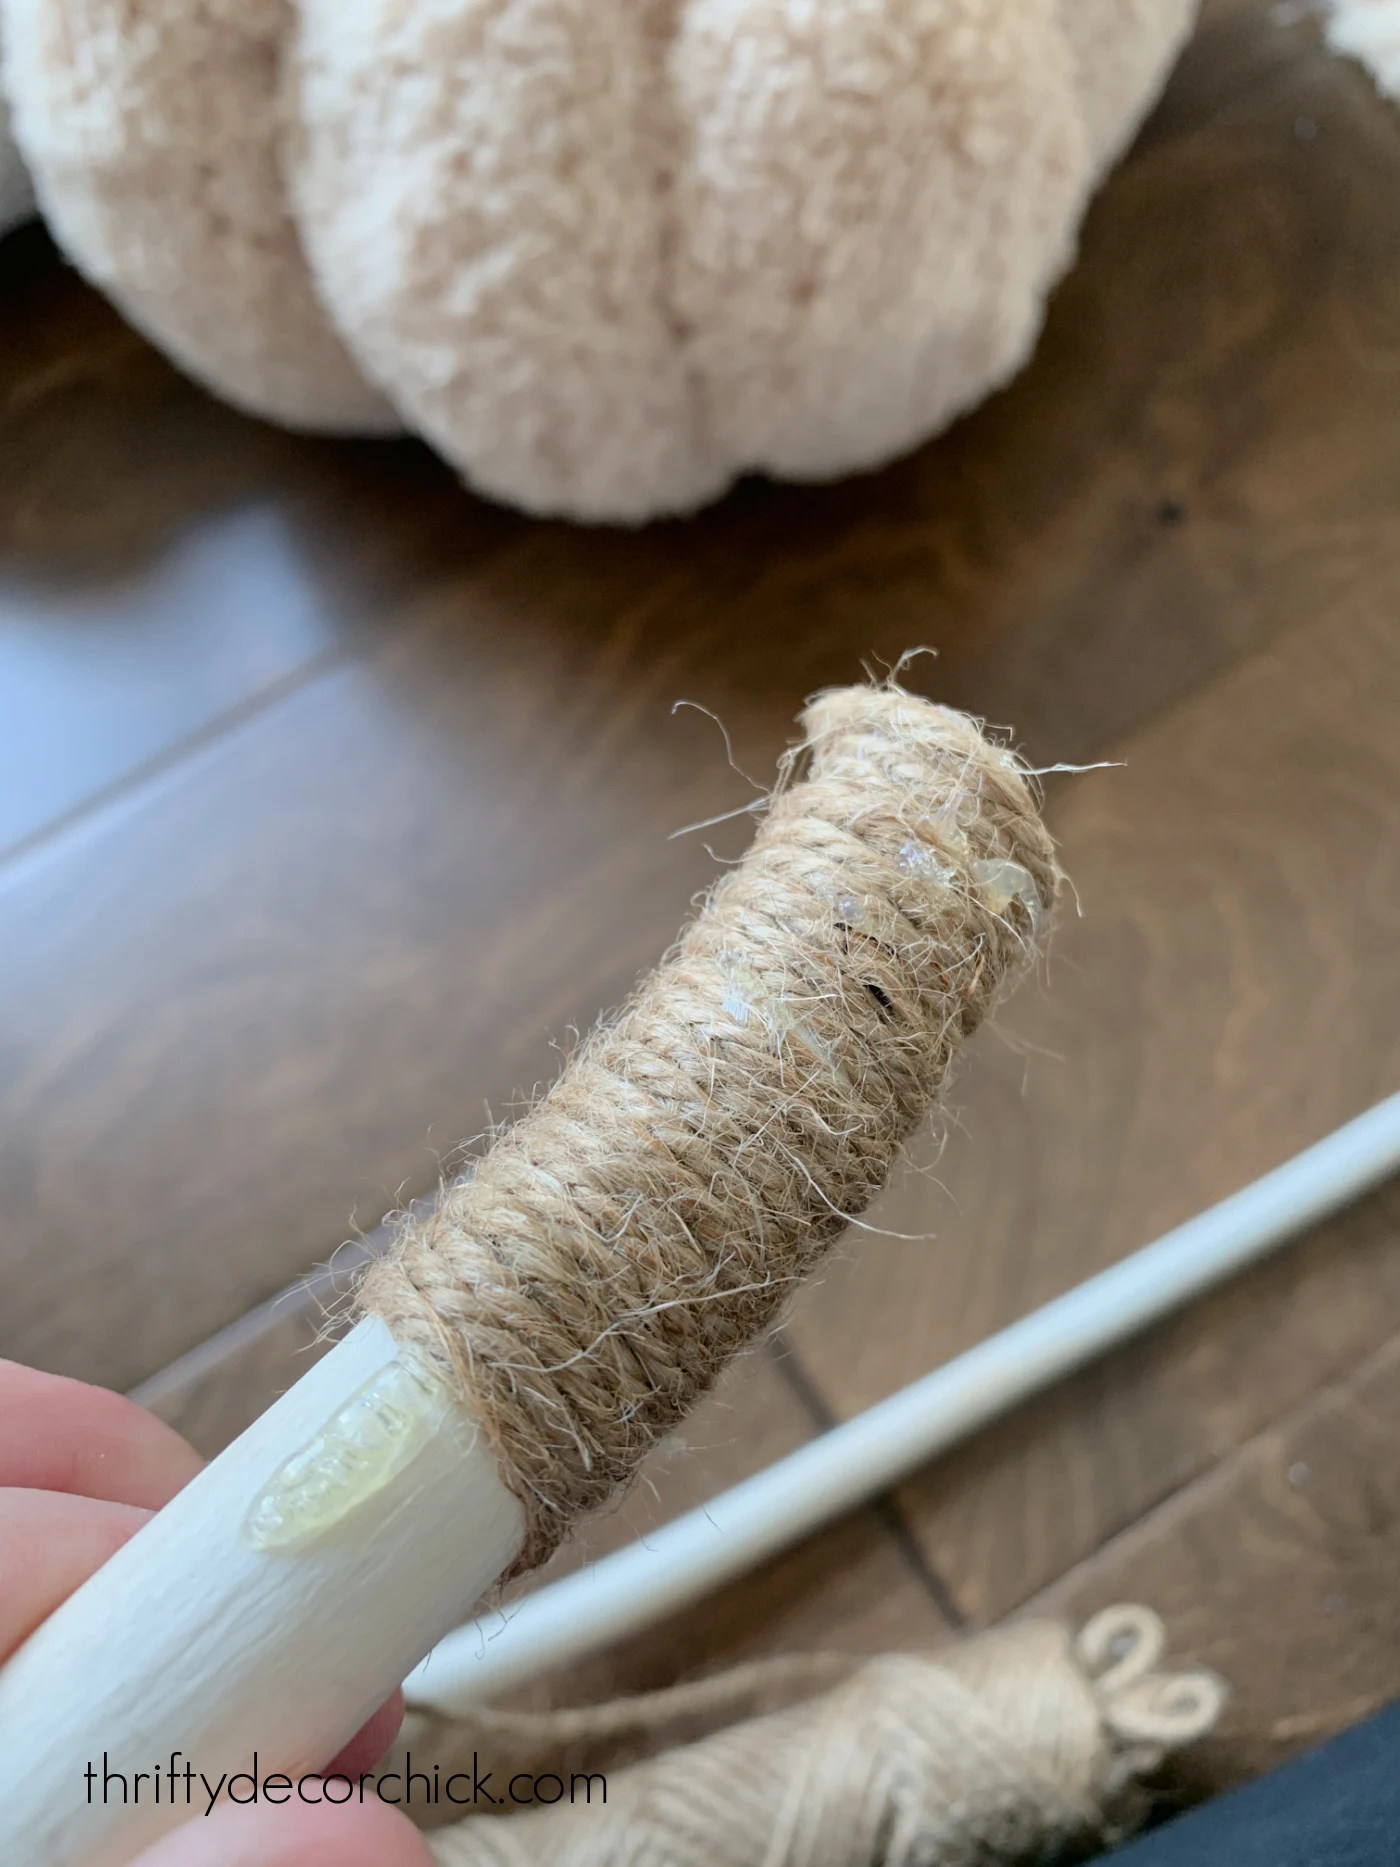
This course of appears tedious but it surely really goes tremendous fast — each solely
took a minute or two.
If I wanted my stem to be thicker to fill the middle gap a bit extra, I
simply wrapped it with twine twice to make it a bit wider.
I loaded up the underside of the stems with sizzling glue and caught them into the
center of the pumpkins. They don’t seem to be loopy safe — loads sufficient, however I
will not be grabbing them by the stem to hold them round.
(If you already know of a safer manner so as to add the stem, please share!)
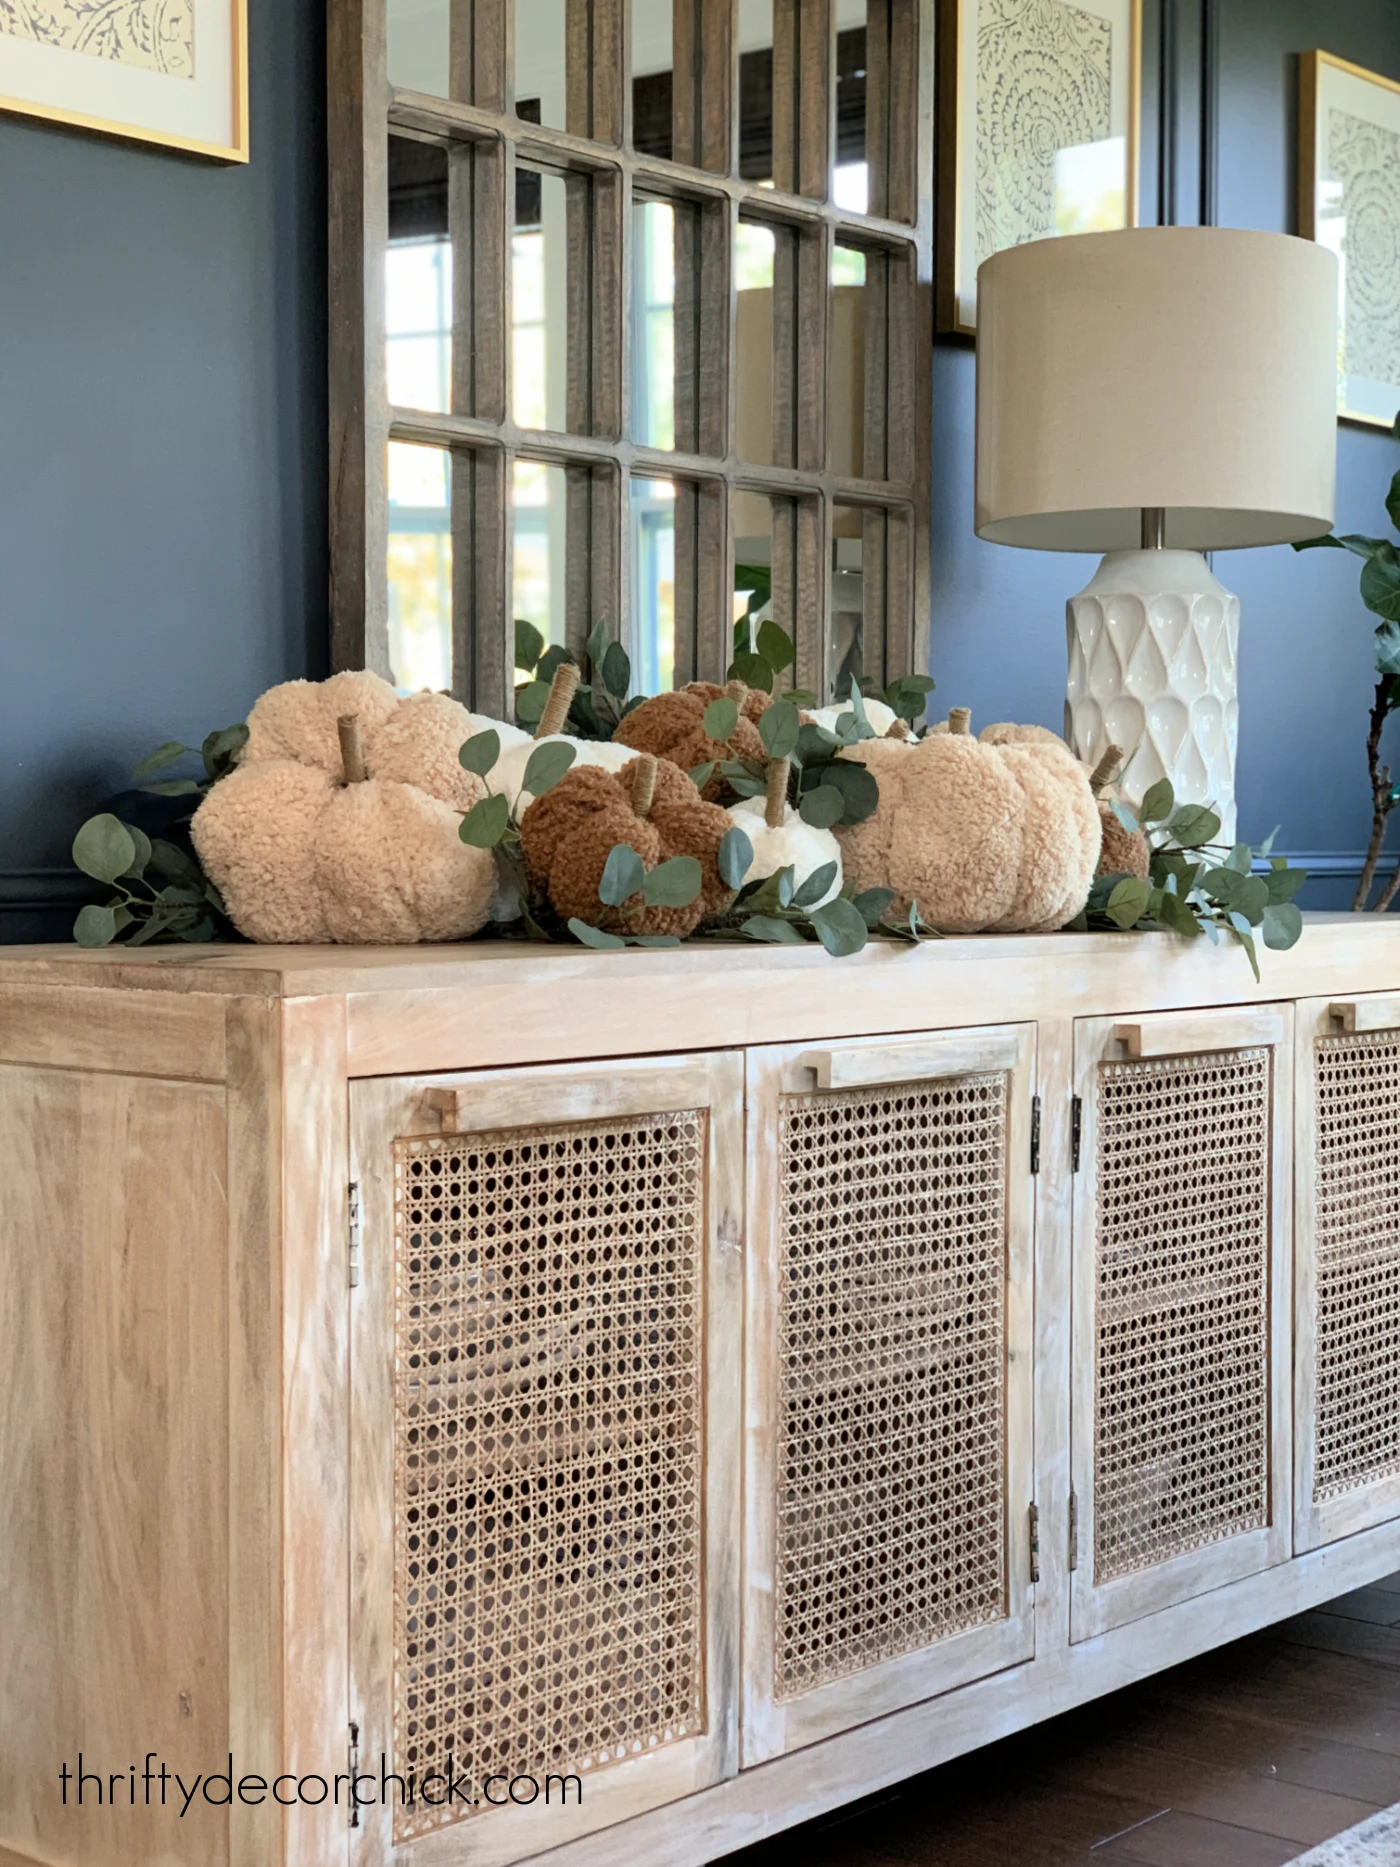
I used to be planning to make three, however I beloved these cute stuffed pumpkin SO
a lot, I saved going.
They’re SO CUTE!:


The material went a great distance — I obtained lower than a half of a yard in every coloration
and was in a position to make 9 pillows. I also have a little further material
leftover.
Aren’t they adoyable?? (As my niece says.):
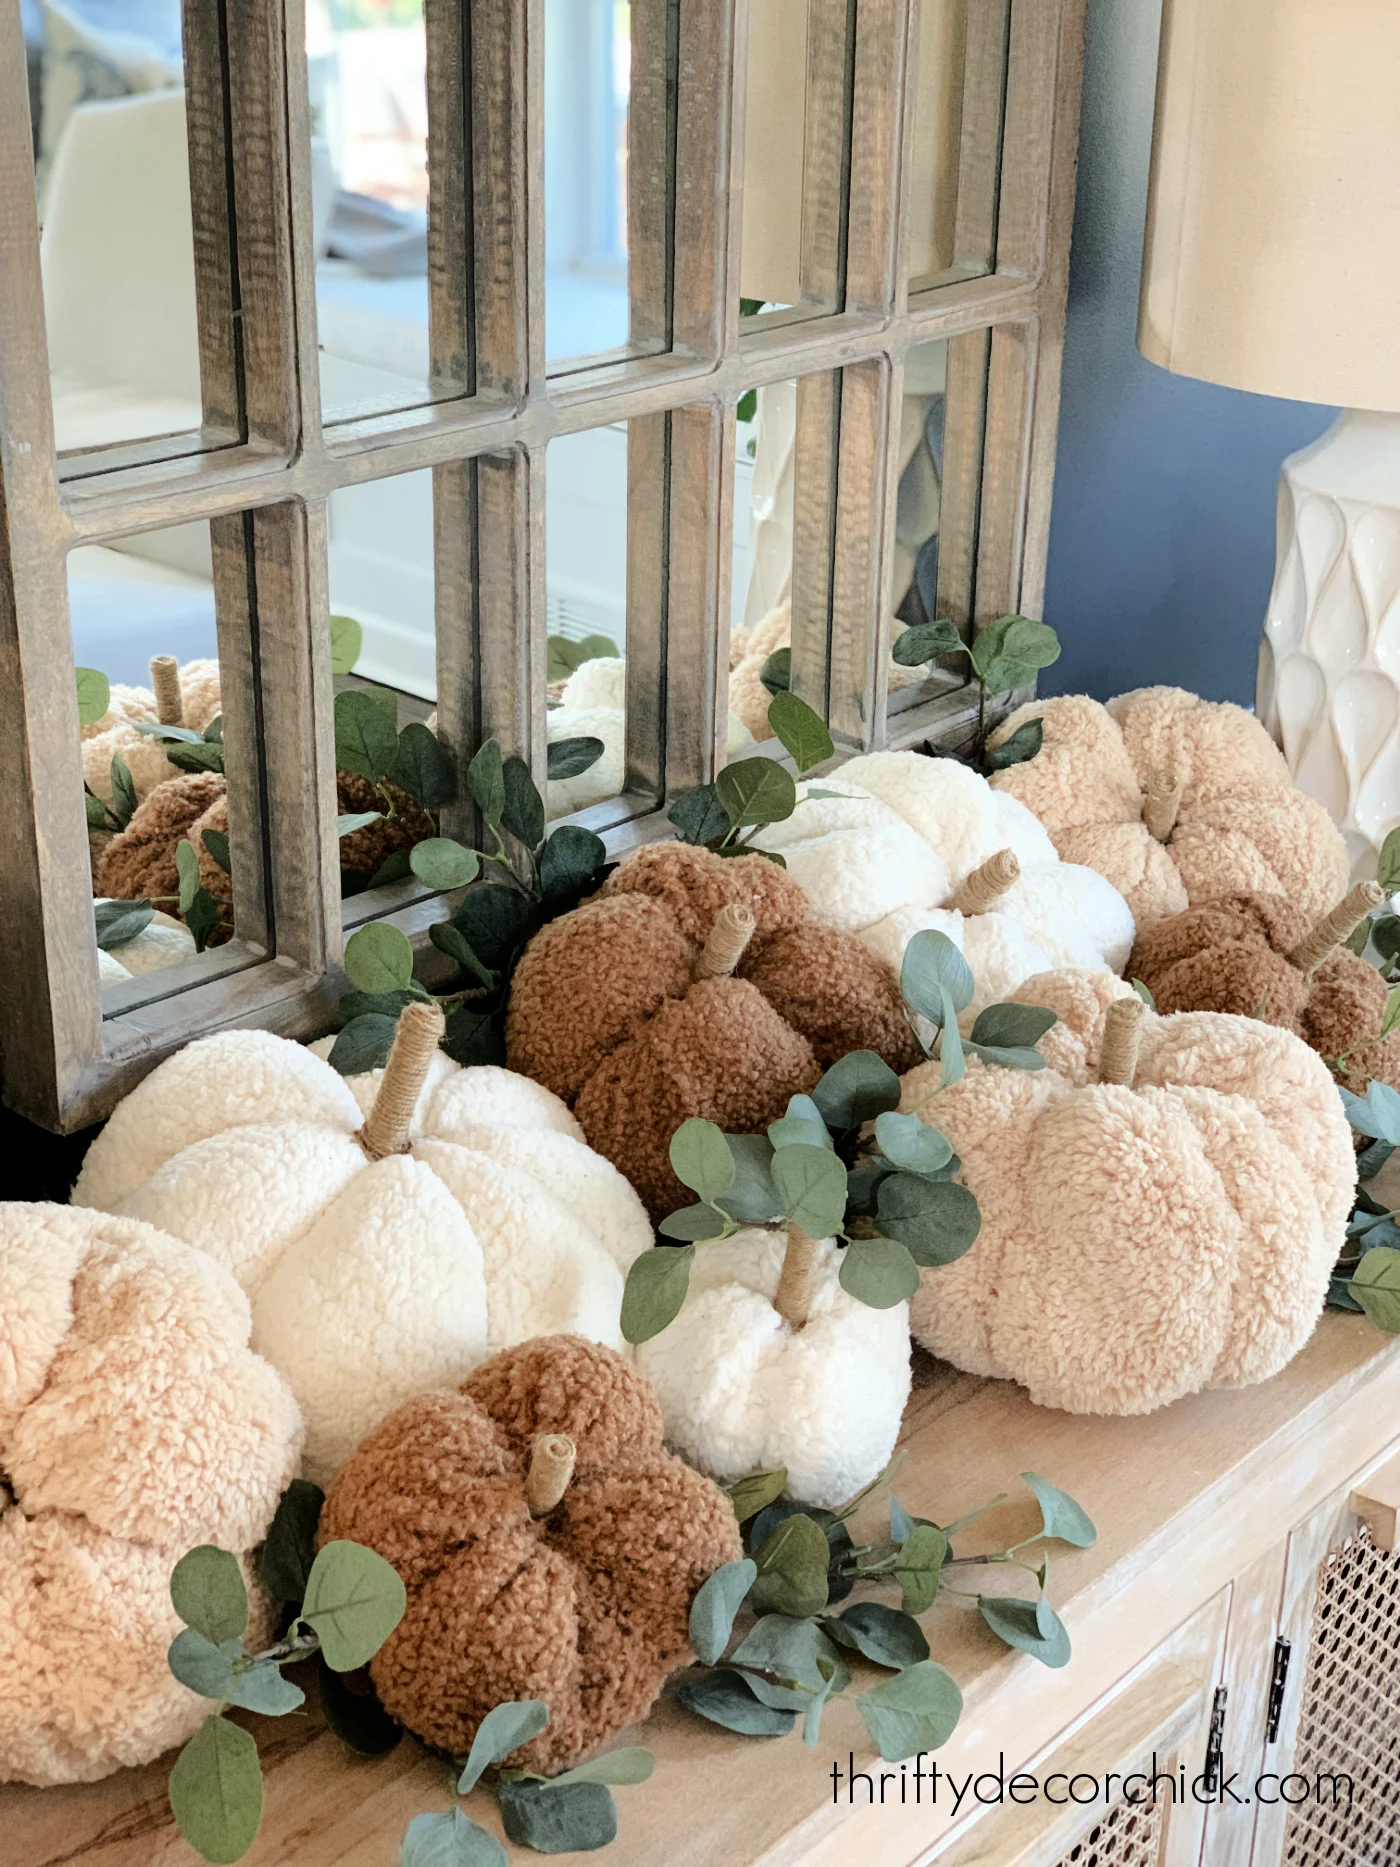

They’re so extremely mushy and I simply love them.
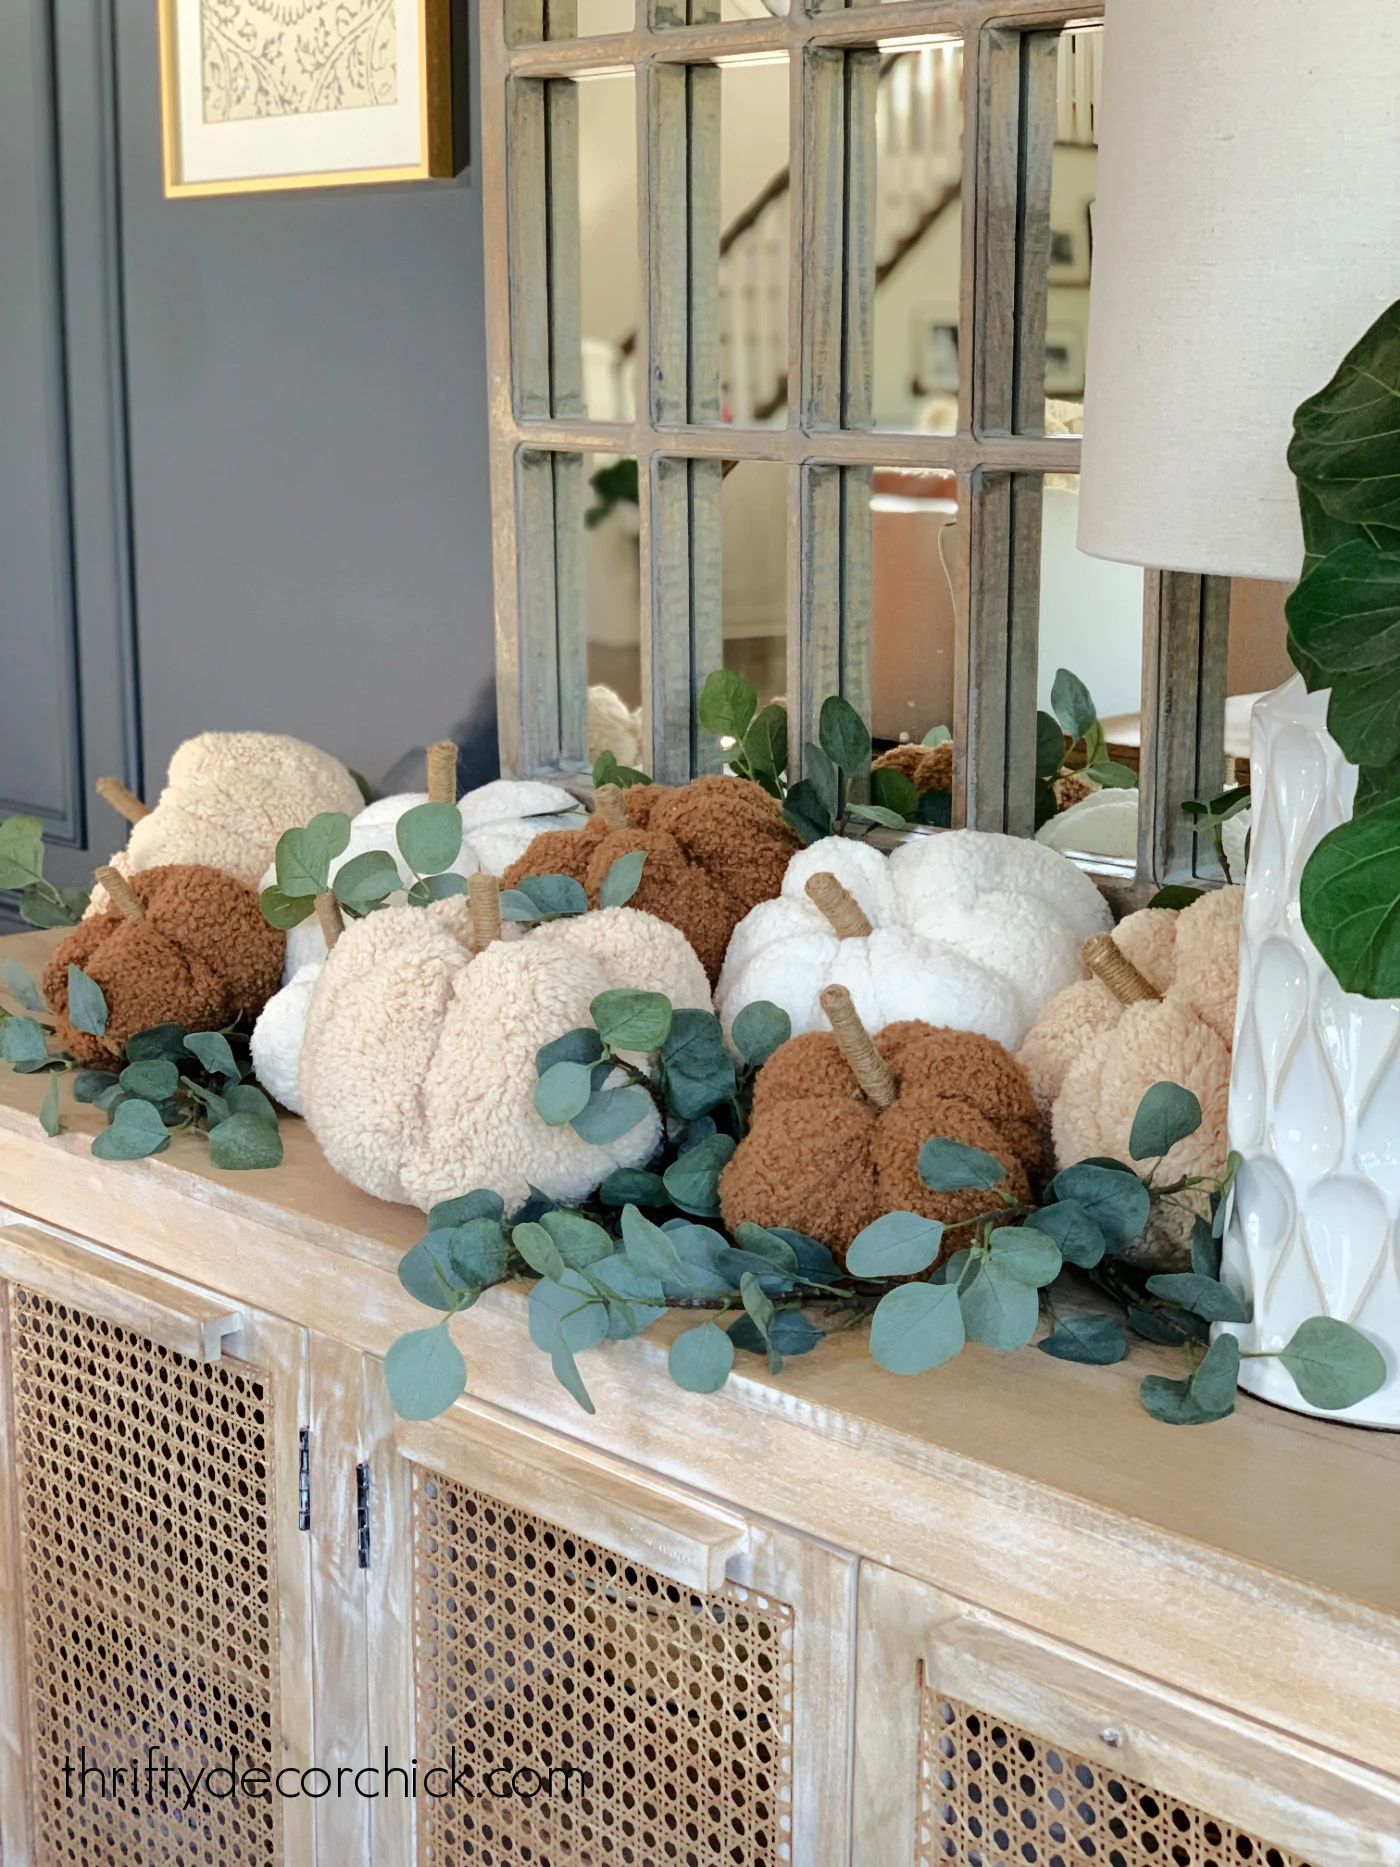
The very best half? I made all of mine with $30 price of material and fill — and
the smallest Pottery Barn teddy bear pumpkin is $29.
Soooo I obtained 9 for the worth of ONE:
No disgrace in shopping for, consider me…generally it is the one technique to go in my
thoughts. However in the event you just like the look of those stuffed pumpkins, it is price attempting
to make your personal for manner much less!
You may’t beat 9 for the worth of 1!
This is able to be such a enjoyable craft venture to do with pals or older children for
a craft evening.
Attempt utilizing outdated sweaters or blankets to make these stuffed pumpkins as nicely!
Have you ever tried making your personal material pumpkins?
You may pin this tutorial for later utilizing this picture:

Trending Merchandise


