
These ten DIY hacks will make your subsequent portray or wooden challenge simpler!
I’ve gathered my favourite little hacks and ideas for house DIY initiatives to share with you! They’re tips that get monetary savings and make initiatives go a lot smoother.
I take advantage of ALL of them constantly they usually assist a ton, whether or not you are staining, portray or constructing.
My summer time of slothdom is about to finish my buddies! When you’ve been studying for some time you know the way I do. Warmth makes me…drained. And grumpy. However largely actually lazy drained.
I am already dreaming up a bunch of DIY initiatives I need to deal with now {that a} regular schedule might be upon us once more quickly.
That had me eager about these DIY tips. A few of them are fairly fundamental, however I want I’d have identified about them in my early do-it-myself days.
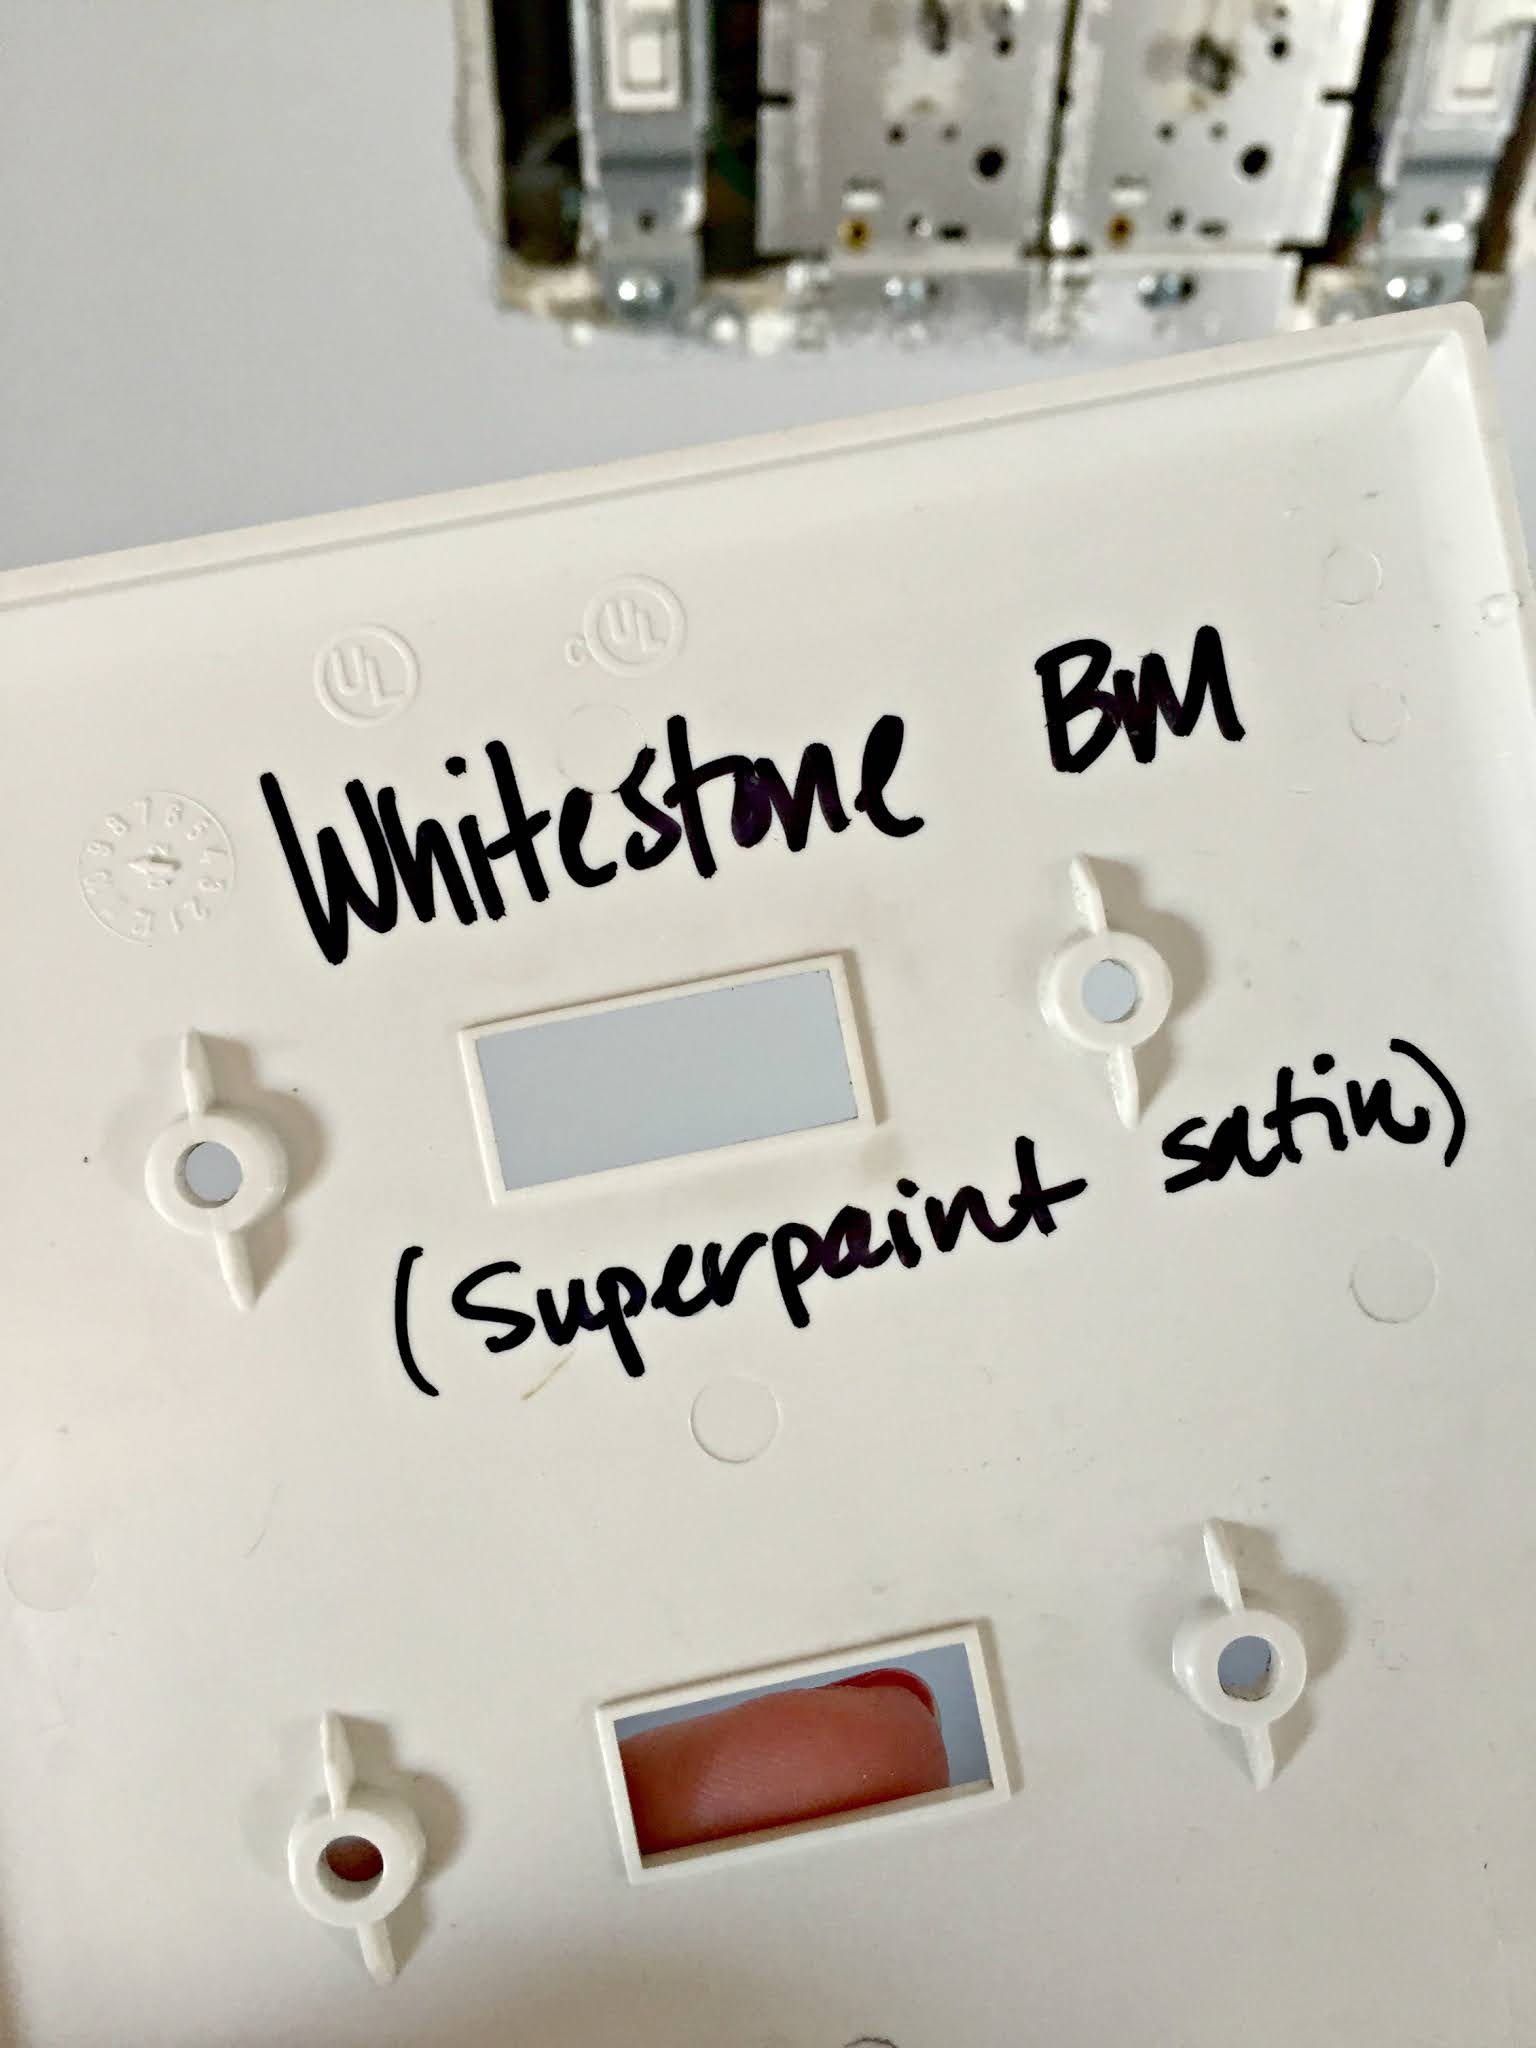
1. Always remember a paint coloration
We have all been there — it’s essential to contact up a spot, otherwise you love a coloration a lot you need to use it once more. However did you utilize eggshell or satin? Was the colour Storm Cloud or Stormy Clouds?
Use a sharpie and label the again of your swap cowl with the title, sheen and model of your paint:
This publish might comprise affiliate hyperlinks on your comfort.
I’ll earn a small fee when you make a purchase order via hyperlinks.
That is tremendous useful, particularly in the event you’re used comparable colours all through your home, or perhaps a completely different sheen.
2. Insulation tubing to fill holes

It is referred to as backer rod and is the proper solution to fill massive gaps in trim or alongside the ground. (Backer rod is made for this function, however any small foam tubing will work!)
Because it’s really easy to govern, you’ll be able to lower it to the scale you want and squish it into the smallest spots:

It is particularly useful when you’ve got a giant hole you need to caulk over — you’d have to make use of a TON of caulk. With caulk you need to fill, then and wait again and again because it dries, fill extra, let it dry, and so forth.
With this it fills that in, you may save all that caulk and you’ll end it off with a bead of caulk proper over it.

3. Paper bag as a substitute of sandpaper
I LOVE this little hack and use it usually.
As an alternative of a effective grit sandpaper, tear off a chunk of paper bag to do your remaining sanding on wooden staining and polyurethane initiatives:

Simply “sand” all around the floor with the paper bag and it’ll knock all of that down and depart you with a wonderfully easy floor and no marks.
You should utilize this paper bag trick over a DRY painted floor as effectively!
4. Make low-cost wooden work
Frequent pine is the least costly and has extra knots and defects. Choose pine is costlier and is way smoother and has a cleaner look.
I at all times use choose pine for the areas you may actually see…just like the trim on the entrance of bookcases.
This pine has one coat of paint, however you’ll be able to see a number of the imperfections:

Numerous the time I’ll simply roll on my paint closely in these areas and let it go at that. You may see right here that the paint did not fill in that tough spot sufficient.

I additionally use spackle (that I take advantage of when filling drywall holes) and it holds up simply as effectively.
Use the putty knife to push the filler in after which calmly sand (and clear) earlier than portray once more. You will not even discover the imperfections once you’re executed!
5. Shims are your good friend

You should utilize them beneath, behind and in between to get every thing completely flush.
However they’re additionally useful for inbuilt initiatives and getting the entrance trim wanting tremendous skilled:

See how seamless these entrance frames are on the bookcases? That entrance trim is crucial half in my view — it is what you see greater than anything!
In case your trim does not match up completely, you should use shims to deliver the trim ahead and flush with the remainder.
I did not take the time to do that on my workplace constructed ins. To repair it and convey the entrance trim on the cabinets ahead only a bit, faucet the skinny finish of the shims behind that trim till it brings it ahead sufficient:

By the way in which, it is not the top of the world…more often than not solely you’ll discover these small imperfections. (And anybody else who does will get a cookie…)
You will have to do it from each the highest and the underside, however it can work! When you’ve got the shim the place you need it, rating it with a razor blade the place it meets the trim and snap off the top with the skinny half nonetheless behind the trim.
Use caulk to fill in any gaps the shims created on the highest of the shelf. (On bookcases most might be above your head anyway.)
6. Selecting the proper piece of wooden
The extra you spend on wooden, the much less you may should search for imperfections. It is value it to me to spend (so much) much less on pine and spend a bit extra time digging to seek out “cleaner” boards.
Watch for giant knots (they could pop up or out of the wooden over time), sticky sap (that’s unimaginable to get off), cracks within the wooden and lacking chunk.
When you discover a board that checks all of these off the record, you may additionally need to examine the wooden for bowing.
Wooden can look nice within the retailer, and then you definitely’ll get it house and understand it is so horribly uneven you’ll be able to’t get it to put flat.
You may keep away from this by holding the board in entrance of you on the ground and eyeing it proper down the center:

You may instantly be capable to inform if it is straight and flat.
When you look intently, you may see that my board is barely bowing on the finish — only a little bit of a bow that goes to the proper. This does not hassle me if I am utilizing the wooden for entrance trim, as I do know I am going to be capable to safe it effectively sufficient.
I at all times examine my skinnier molding items for bowing as effectively. If it is skinny sufficient you’ll straighten it out throughout set up, however some items must be averted all collectively.
Verify wooden boards from all sides, because the wooden can bow all types of how.
7. Simple uniform spacing on wall remedies
If the spacing is not constant you’ll discover that small imperfection greater than you suppose.
I’ve discovered a coin is a straightforward solution to get that completely skinny, constant hole between every shiplap:

You may need to transfer it down the plank as you nail it in. Generally I take advantage of a penny for a smaller break, typically a nickel.
Scrap wooden lower to the size you want can be GREAT solution to simply hold measurements constant once you’re putting in a trim challenge:

They make it MUCH simpler to maintain steady distances in the event you’re repeating the identical design all through an area:

8. Chopping a gap in the course of wooden
Generally you may want to chop a gap for an outlet, swap plate or vent on the wall. A jigsaw is the easiest way to chop these smaller, detailed spots:

It is easy to do when your cuts are on the aspect of the board — simply begin slicing along with your jigsaw from the aspect.
But when it’s essential to lower a gap in the course of the board, this trick is useful.
Do NOT attempt to begin a lower with a jigsaw immediately on the wooden. It should rattle throughout and doubtlessly snap the blade.
As an alternative, use a drill and huge drill bit so as to add holes in your wooden as a “starter” for the jigsaw:

That means you’ll be able to slip your jigsaw blade into the outlet and begin a straight lower. I like to make use of 4 holes so I haven’t got to do any curved cuts.
9. Use scrap to guard your initiatives
I are inclined to hold means an excessive amount of scrap wooden…I’ve discovered to let go of smaller items over time but it surely hurts my soul a bit bit each time. 🙂
I hold some scrap as a result of I’ve discovered it is arduous to complete numerous DIY initiatives with out it!
When you’ve got a chunk that could be a tad too tight right into a spot (and you actually do not need to go lower millimeters off of it for the THIRD TIME), use scrap items to hammer your trim into place:

Right here I am holding the scrap beneath the trim and hammering it into place until it’s degree. When you tried to do that on to the good trim half, you’d dent the edges or entrance along with your hammer or mallet.
You do not ever need to pressure your wooden the place it will not match, so if it is means too lengthy lower it down.
For a chunk that’s thisclose to becoming, you’ll be able to simply maneuver it into place by pounding it along with your scrap wooden. And your “good” wooden will nonetheless look nice!
When you look intently, you may see that I additionally use scrap to jot down down my measurements. That is particularly useful in the event you’re going up or down steps to chop your wooden and also you are inclined to overlook the precise measurement by the point you get to the noticed. This might simply occur to me. 🙂
I additionally use scrap wooden items to take away trim — in the event you put an excessive amount of stress on a crowbar it can dent or break the drywall:

If there’s an excessive amount of resistance as you push the crowbar again to tug the bottom away, it can dent your partitions. Place a skinny piece of scrap wooden behind the crowbar and the wooden will disperse the stress.
10. Simply clear paint brushes
I take advantage of this brush cleansing comb each time I clear my paint brushes:
 |
You utilize it to comb the paint and dried up bits out of your paint brush. I take advantage of it after I wash the brushes, after which typically later after they dry to get any little further bits out of there earlier than portray once more.
Do you utilize any of those easy DIY ideas? I take advantage of them on ALL of my initiatives, huge to small. I am positive I’ve forgotten a couple of, however these are my favorites.
Any others you utilize constantly?
Trending Merchandise


