
I made fairly a little bit of progress on the studio workplace space cupboards yesterday, and it’s getting actually thrilling to see this space come collectively. I confirmed you the opposite day that I got all of the doors and drawer fronts finished. I put in most of them and took an image so we may get an concept of how this completed space will look. It nonetheless takes some creativeness to examine it, however right here was my progress…

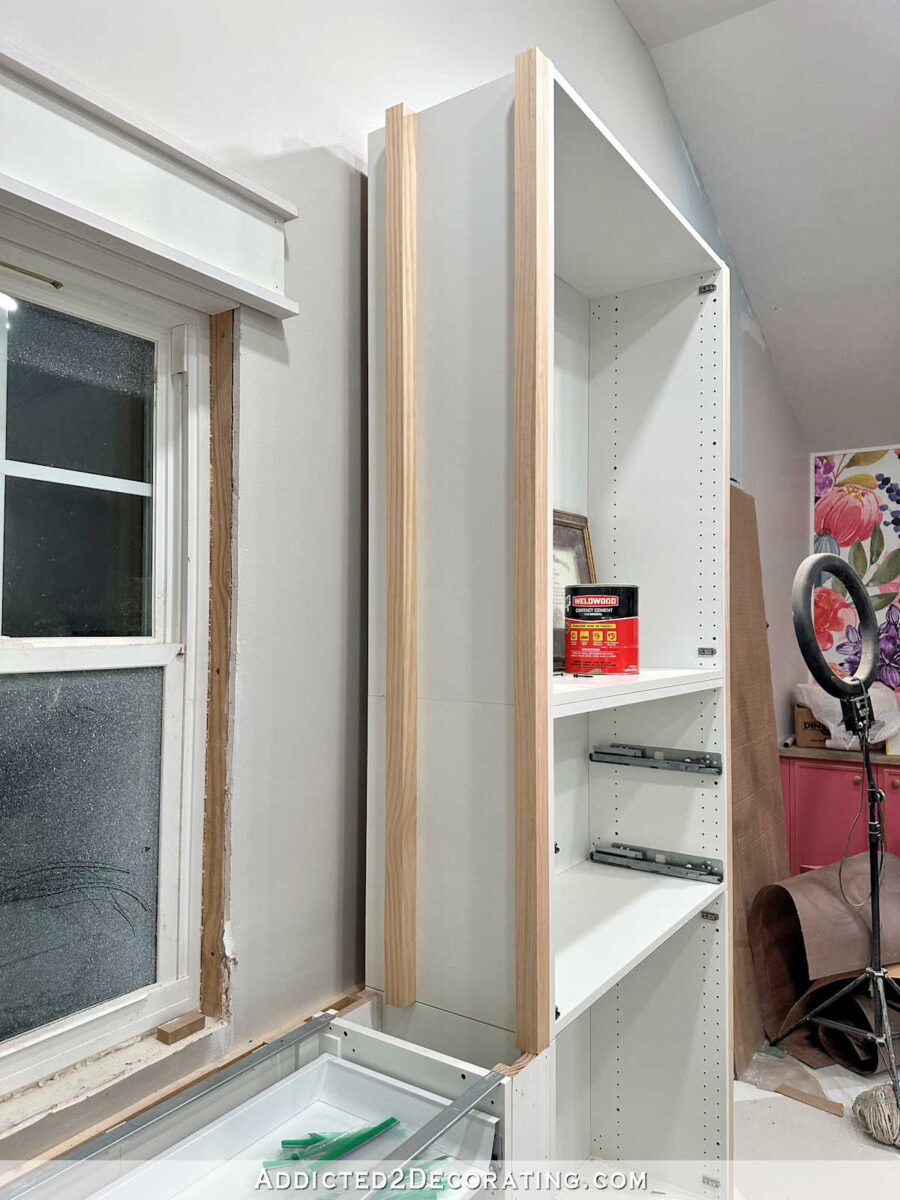
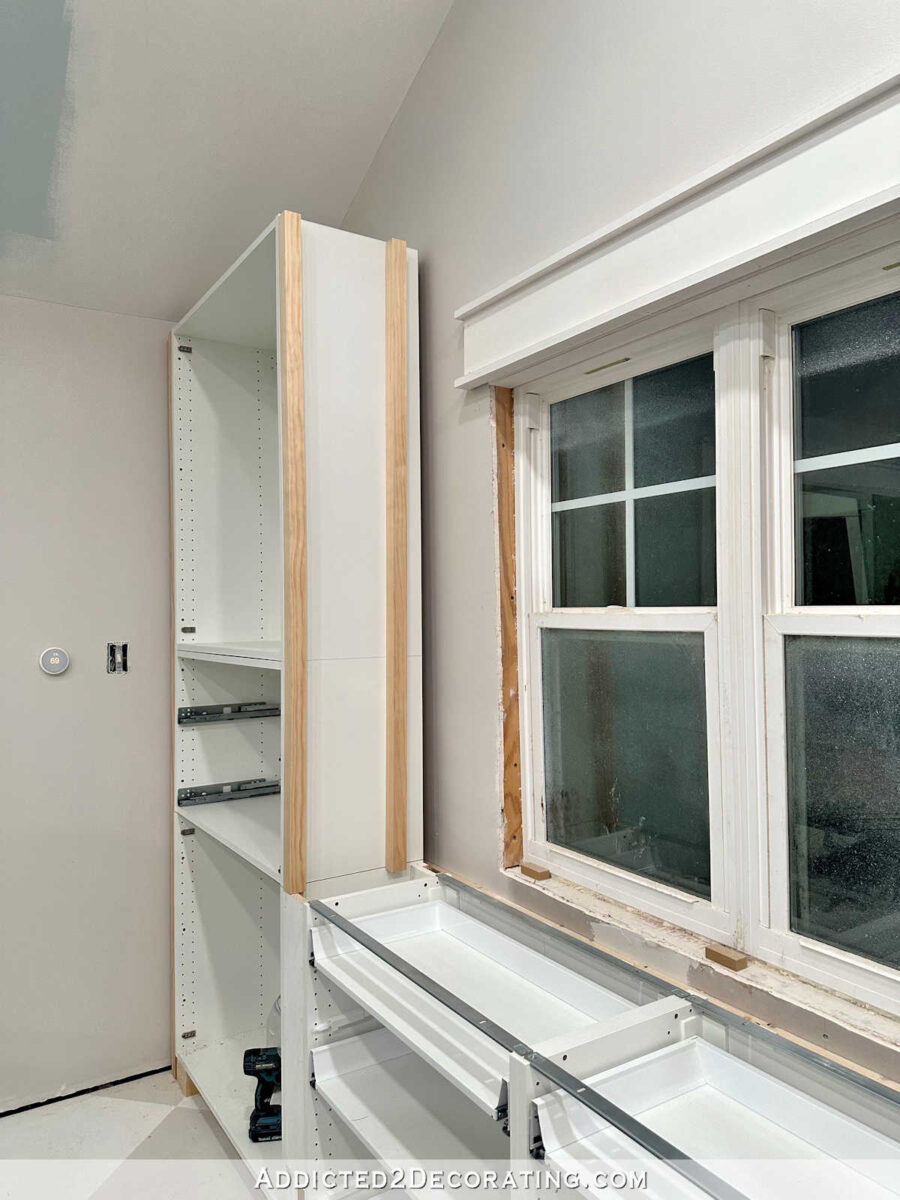
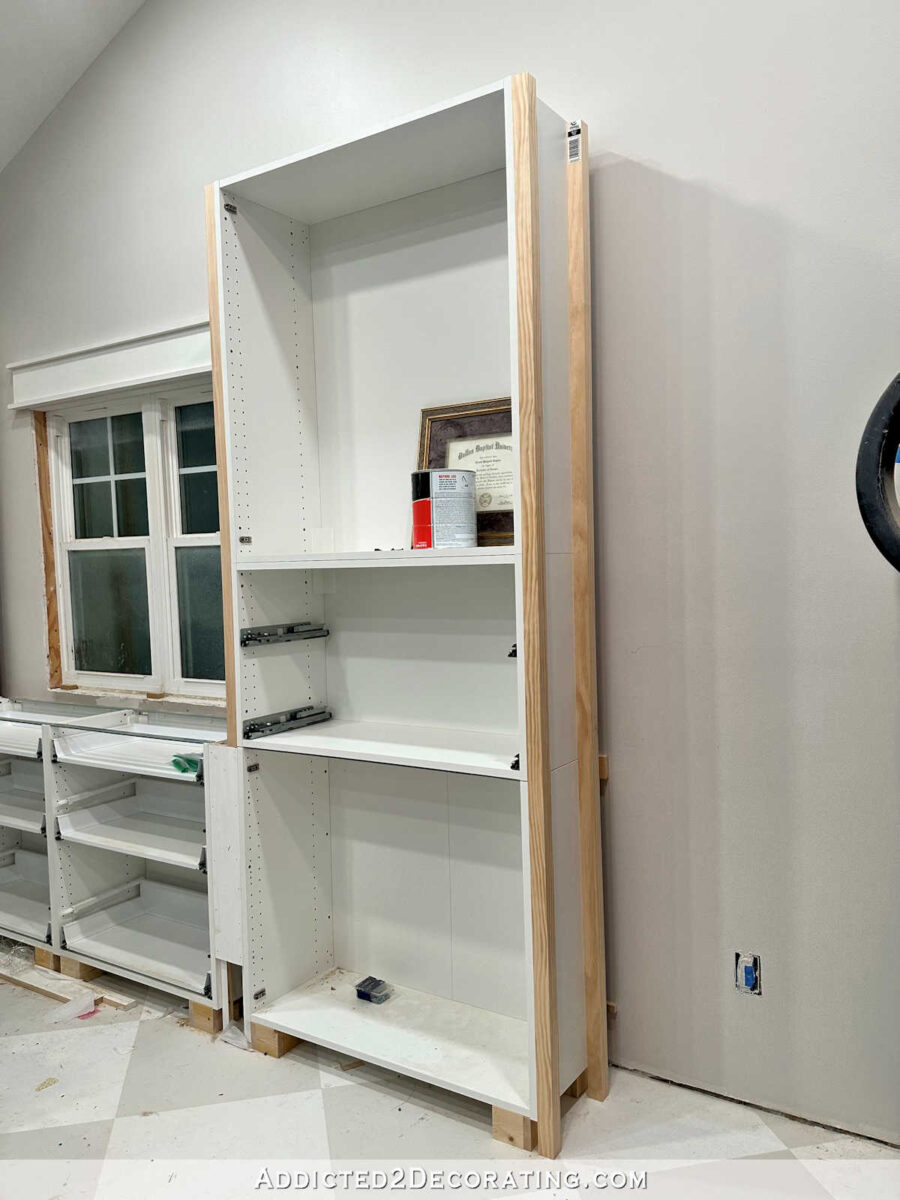
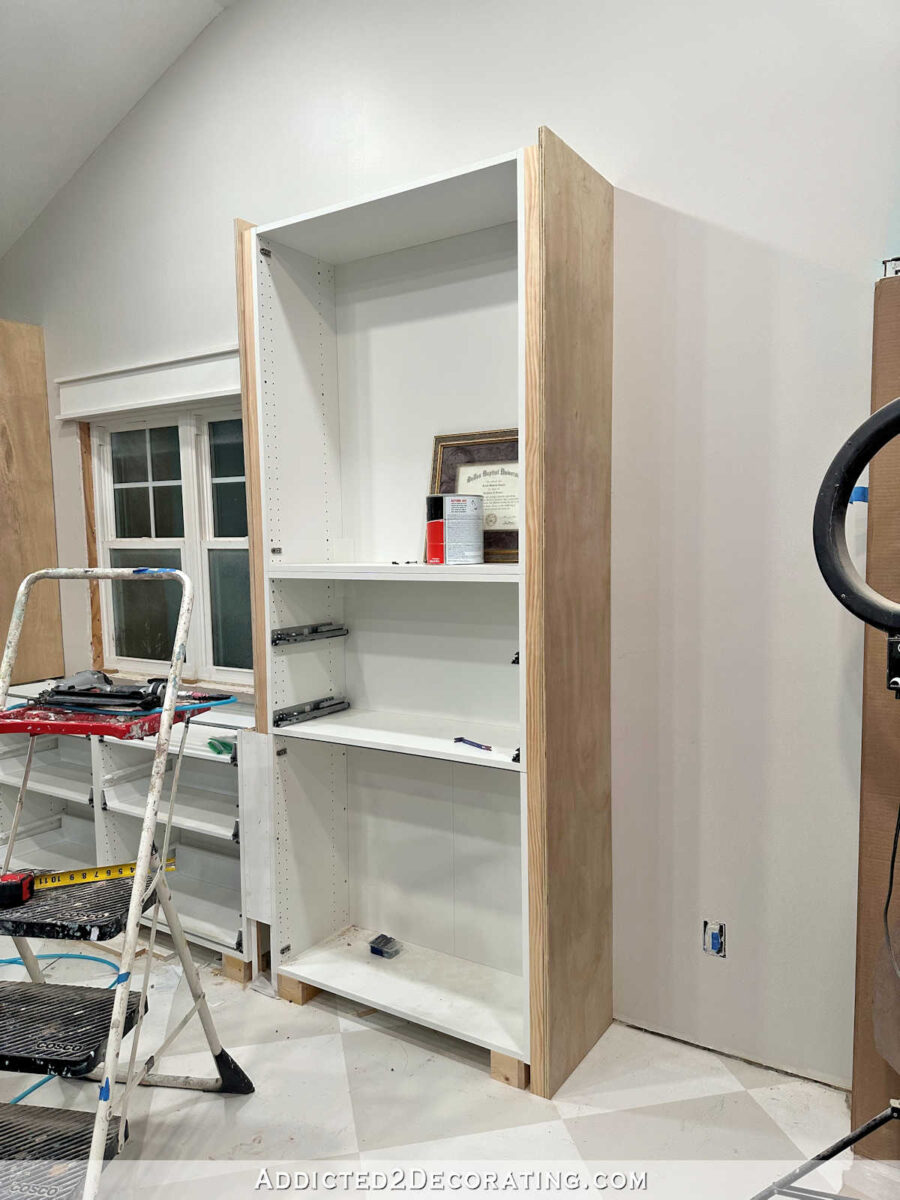
So with these completed, I needed to take away all the doorways and drawer fronts to work on the cupboard containers and get these completed. I began by including 2″ x 2″ lumber to the facet of the left cupboard to fill within the area between the left cupboard and the wall. I hooked up this utilizing screws that I screwed by the shelf pin holes (I used holes that I used to be certain I wouldn’t want for my shelf placements) inside the cupboard and into the two″ x 2″ wooden. This 2″ x 2″ wooden piece provides me a floor to connect the ultimate trim piece later.

I did the identical factor on the opposite sides of the cupboards. However on the opposite three sides, I hooked up two 2″ x 2″ items of wooden, one flush with the entrance fringe of the cupboard and one other in direction of the again, as a result of these can be used to connect the plywood to cowl the edges. Once more, I hooked up these utilizing wooden screws that I screwed by the shelf pin holes inside the cupboard, by the cupboard, and into the wooden. However the necessary half with these was to ensure that the entrance 2″ x 2″ piece was completely flush with the entrance fringe of the IKEA cupboards.
I repeated that course of on the opposite facet…
After which I repeated that course of another time on the skin of the best cupboard.
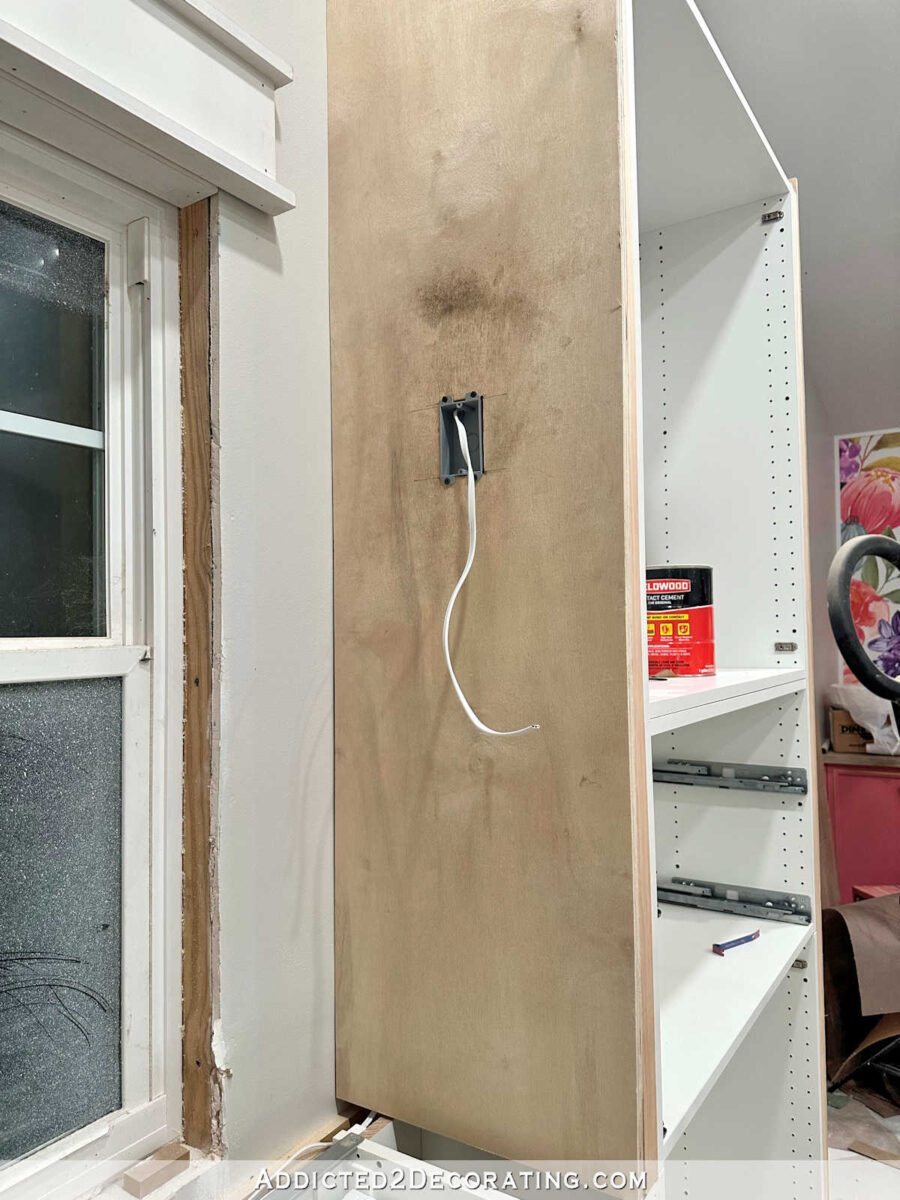
With these strips hooked up, I may connect the plywood piece to the skin of the best cupboard. I hooked up this utilizing 1.5-inch 16-gauge nails, and I nailed it proper to the two″ x 2″ wooden items. You’ll be able to see that I lower the plywood items a bit taller than the cupboard to provide me one thing to connect trim and crown molding to in a later step. And as soon as once more, I made certain that the entrance fringe of the plywood was completely (or as completely as attainable) flush with the entrance edges of the two″ x 2″ wooden and the entrance fringe of the IKEA cupboards.
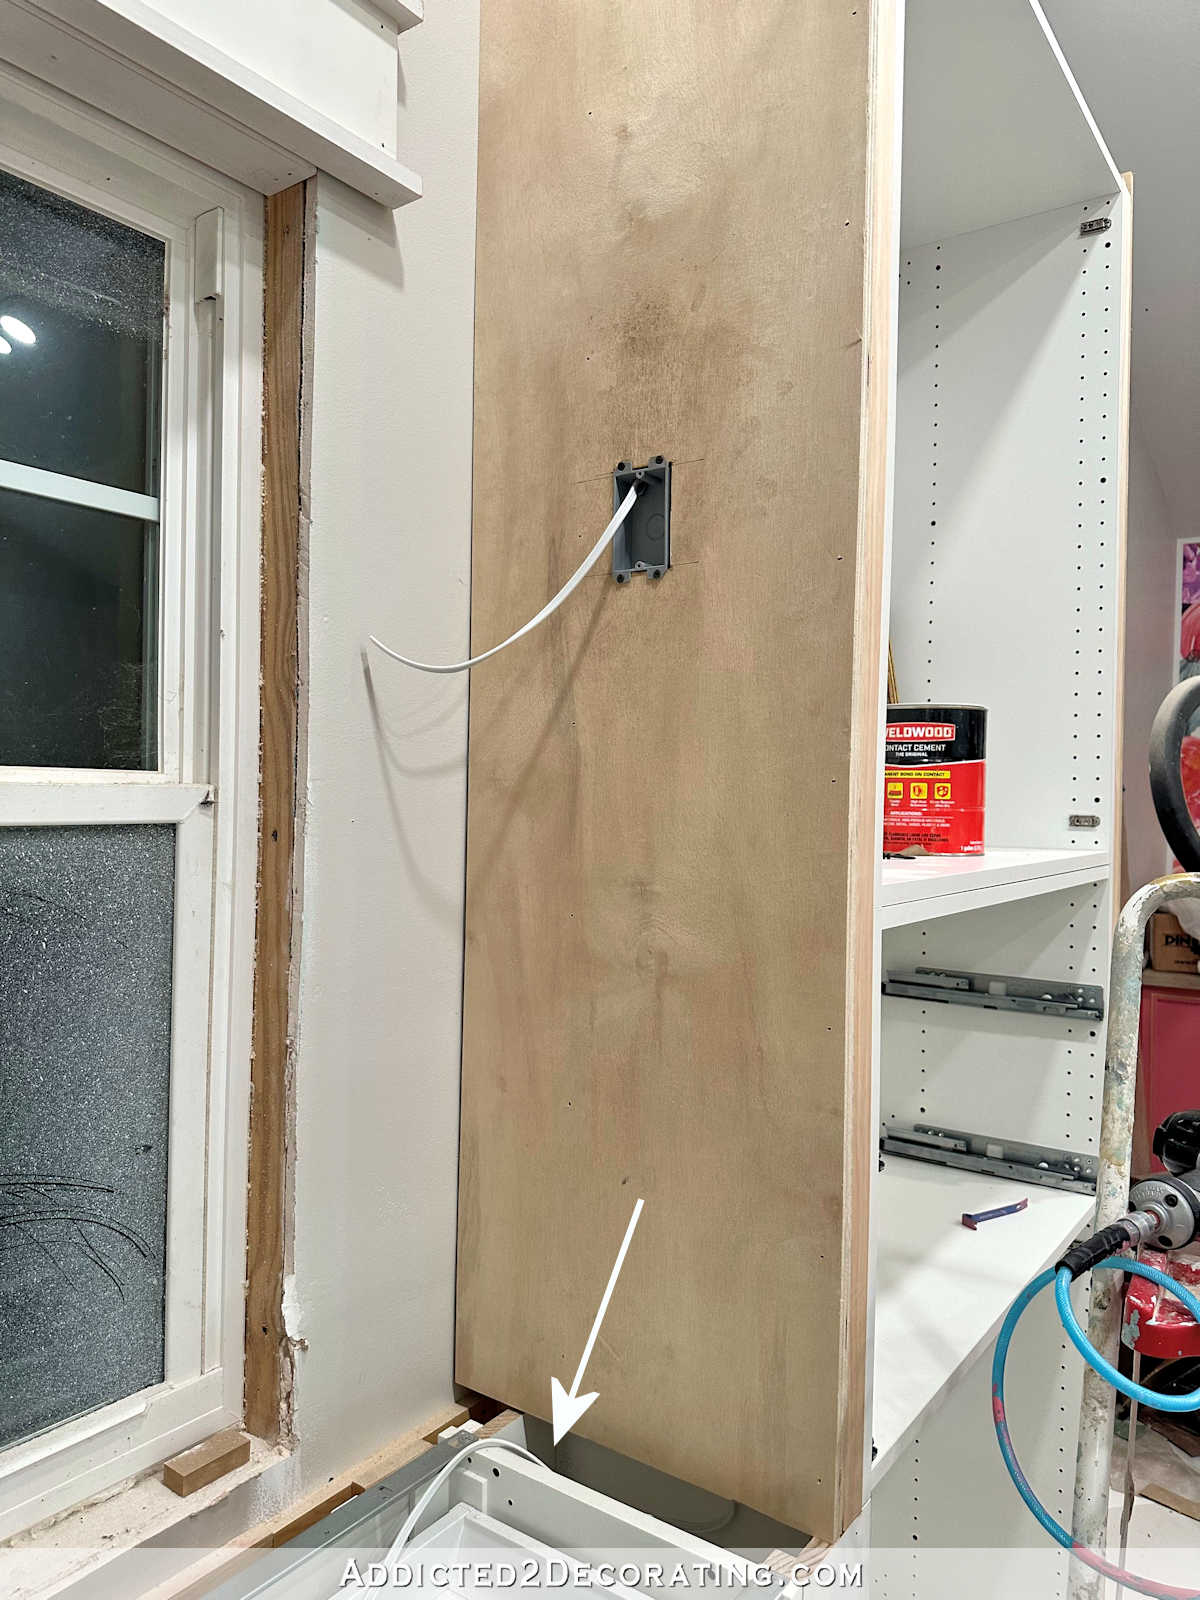
Since I made a decision so as to add sconces to the window facet of every cupboard, I had so as to add junction containers to the plywood panels earlier than I may connect these. I used shallow previous work containers for this in order that they’d match inside the realm between the plywood and the facet of the IKEA cupboard. I didn’t need to have to chop by the within of the IKEA cupboard for the standard dimension junction field to suit. I measured and marked the place I needed the field to go on the plywood panel, after which used the field as a template to hint round to mark the place to chop.

I made certain to get it good as a result of I solely had one likelihood at this. If I messed this up, I’d have to chop a complete new piece of plywood.

I used my Dremel Multimax oscillating noticed to chop the outlet for the field. You might additionally use a drill and jigsaw, or perhaps a router. With the outlet lower out, I hooked up my previous work field, which simply screwed to the plywood.

I forgot to take an image of the junction field earlier than standing the panel upright and working the wire by it, however you may nonetheless see it fairly clearly right here. You’ll be able to see that previous work junction containers sit on high of the floor (drywall, or within the case, plywood), making it very straightforward to easily screw the field into place. New work containers sit behind the floor materials (typically drywall), in order that they’re not helpful for a venture like this.

I made a decision to make use of heavy responsibility extension cords (with the bottom wire) to wire the sconces. With a view to use the extension twine, I had to make use of my wire cutters to chop off this finish.

The wiring needed to be accomplished earlier than I hooked up the plywood panel to the cupboard. So I ran the wire behind the panel and thru the junction field.
The opposite finish of the twine got here out on the backside of the plywood panel…

You’ll be able to see right here that it simply ran straight down behind the plywood and into this area between the cupboards.

After which utilizing a 1-inch drill bit, I drilled a gap within the again spacer in that part, and threaded the wire by that gap.

After which I ran the wire on this area behind the cupboards, however above the spacers/braces that I used to connect the cupboards to the wall. I positioned a scrap 2″ x 2″ piece of wooden on high of the cupboard the place the countertop will ultimately go in order that you might see how a lot area the wire has to journey by. It’s fairly a big area (about 2″ x 1″), so you may see that nothing can be constricting the wire as soon as the countertop is in place.

As soon as the wire was in place, I used to be in a position to nail the plywood panel onto the facet of the cupboard.

At that time, right here’s what the best financial institution of cupboards seemed like with the two″ x 2″ lumber and plywood panels added to either side of the cupboards.

Right here’s a peek at one of many sconces. I couldn’t maintain the sconce in place and take an image, so that you’ll simply should think about it up on the facet panel the place the junction field is. And naturally, I might want to paint and gold leaf the sconces to match the pendant lights on the mural wall.
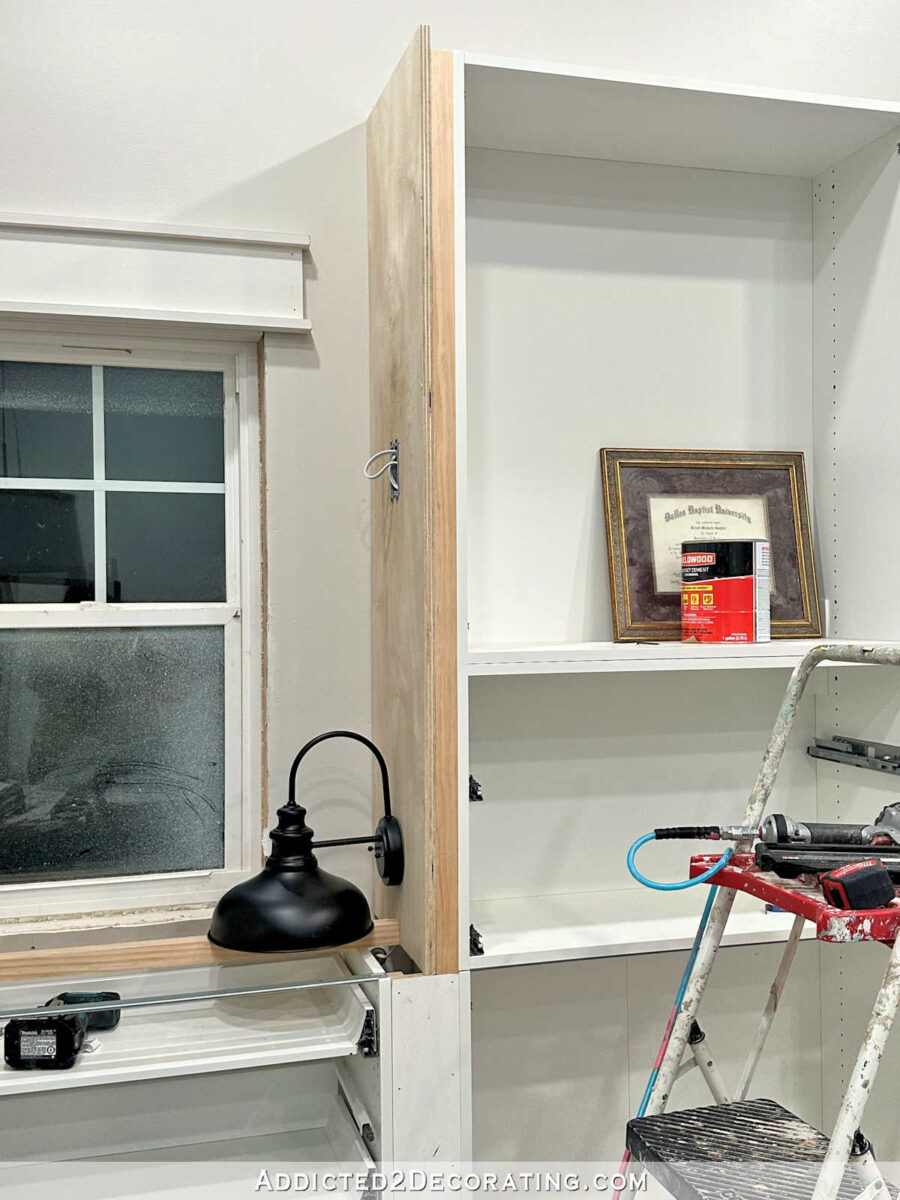
With that facet panel in place, I wanted to complete up the facet panel on the left facet. The wire from the best facet ran behind the cupboards all the way in which throughout the again below the window.

After which I ran that wire, plus a second wire (extension twine), by a gap that I drilled in that again spacer, identical to I did on the opposite facet.

After which I ran these up behind the plywood panel, and thru the junction field.

That second wire (extension twine) then ran behind the left cupboard, and thru this entry panel that I needed to lower behind the center cupboard on the left facet.

You’ll discover that on the primary extension twine, I lower off each ends in order that I used to be simply left with the wires. However on this second extension twine, I solely lower off the top the place the sconce can be wired, however I saved the top with the plug. That’s as a result of, after I end wiring up this outlet behind this entry panel, the sconces will plug into the outlet. I’ll management the sconces with a remote-controlled outlet.

After these wires have been run on this facet, I used to be in a position to nail the plywood panel into place.

In order that’s the progress to this point! I used to be so excited to get all of this accomplished. Working by the logistics of wiring up these sconces took me a little bit of time to determine, and it’s all the time such an enormous aid when a plan works out. 😀

At the moment, I’ll be engaged on the bridge with the cubbies. For those who’ll keep in mind, that is the imaginative and prescient…

I’m working on my own, so I’ve been considering by precisely how I’m going to construct a giant, cumbersome plywood bridge with cubbies, elevate it into place on my own, whereas attaching it to the facet cupboards on my own. These are the challenges I’ve to work by very often as a DIYer who works alone. However I feel I’ve it found out. I suppose we’ll all discover out tomorrow if my plan labored. 😀

Addicted 2 Adorning is the place I share my DIY and adorning journey as I transform and enhance the 1948 fixer higher that my husband, Matt, and I purchased in 2013. Matt has M.S. and is unable to do bodily work, so I do the vast majority of the work on the home on my own. You can learn more about me here.
Trending Merchandise


