
I do know that is beginning to really feel just like the by no means ending challenge. Imagine me, I’m getting uninterested in engaged on it. However I’m at that stage within the challenge the place the entire ending particulars take so lengthy. The constructing is at all times the quick half, however the ending at all times appears to take means longer than I believe it ought to.
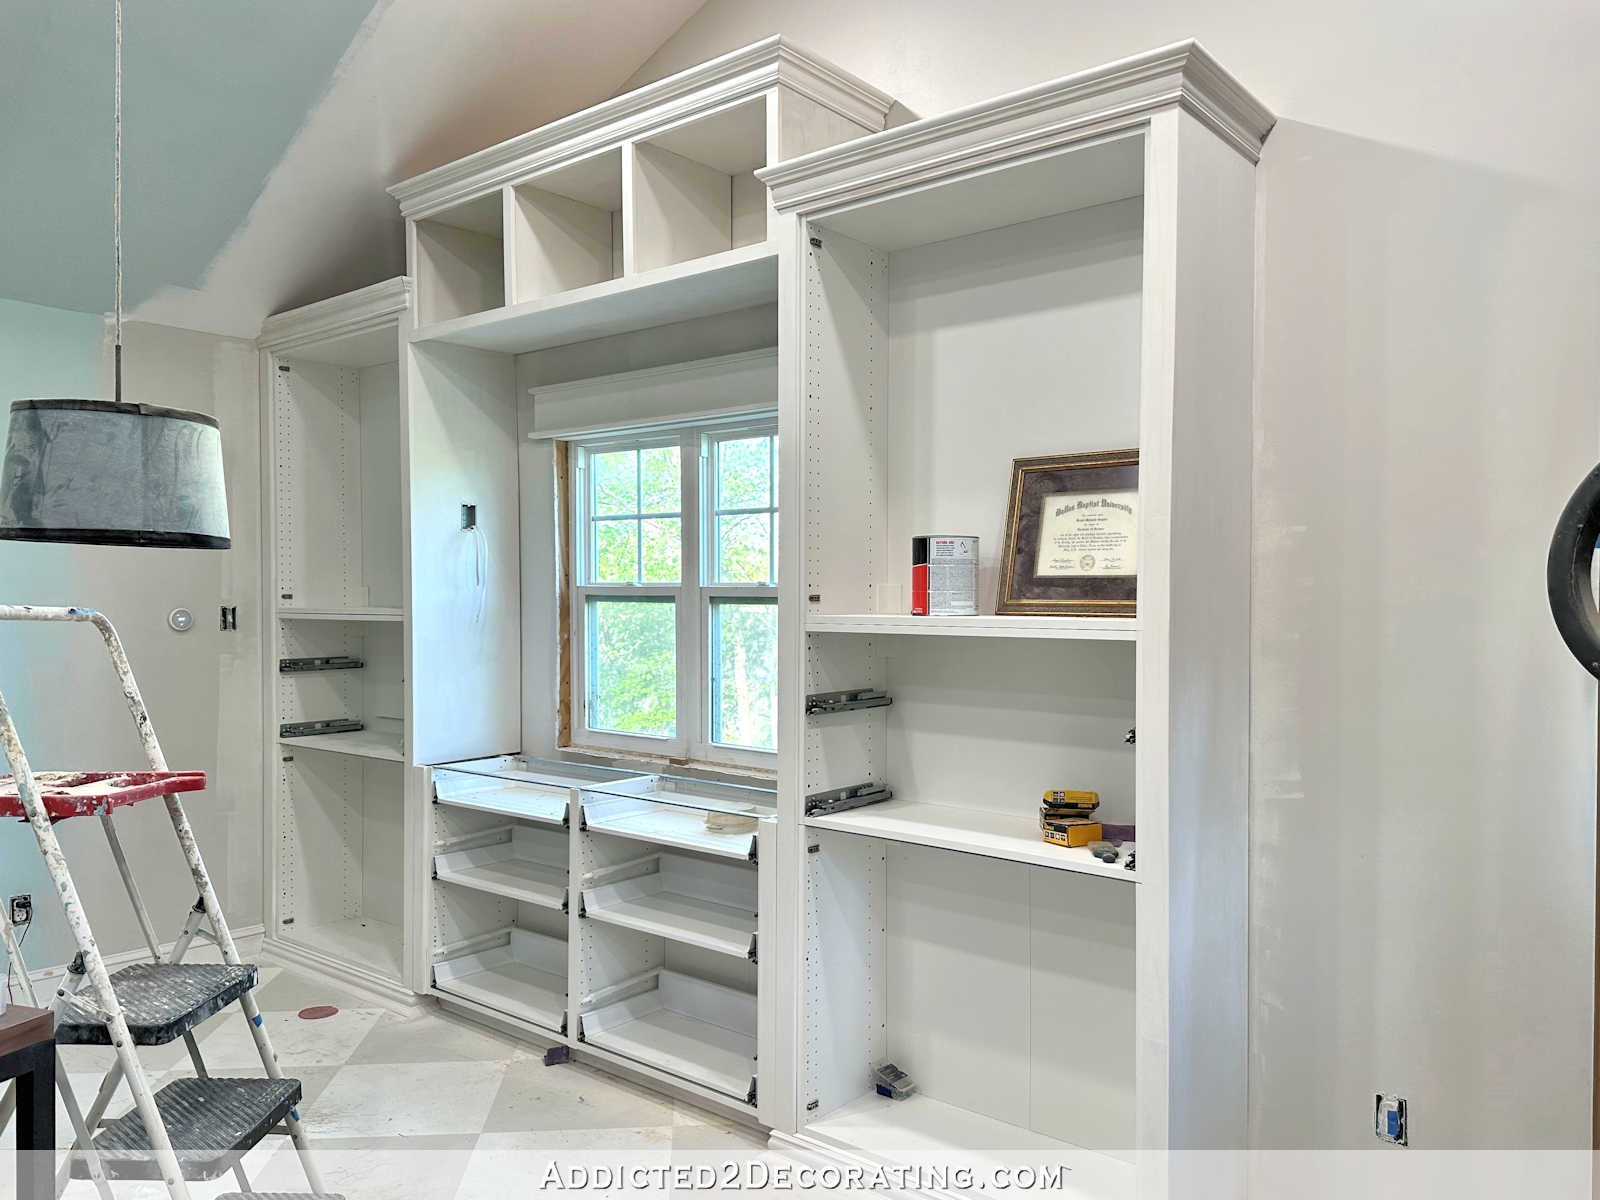
The excellent news is that the entire cupboard unit within the workplace space of the studio has now been wooden crammed, sanded, primed, and sanded once more. So after a bit of little bit of caulking, it will likely be prepared for paint! The ultimate colour will likely be pink, however I do love that I can lastly see all of it one colour now. The final time I confirmed you the progress, it appeared like this…

And now that the entire thing is primed and sanded, it appears to be like like this…

To prime the cupboards, I used Zinsser B-I-N Shellac-Based mostly Primer. It’s a brand new favourite product for me. I used it for the primary time on the ceiling of the entrance porch once I repainted it again in April of 2023. The primary time I painted the ceiling, I didn’t prime the wooden in any respect, so all of those knots had seeped by way of the paint.

And right this moment, nearly a yr later, there’s not a single knot displaying by way of the brand new paint. It nonetheless appears to be like prefer it did the day I took this image after repainting the ceiling.
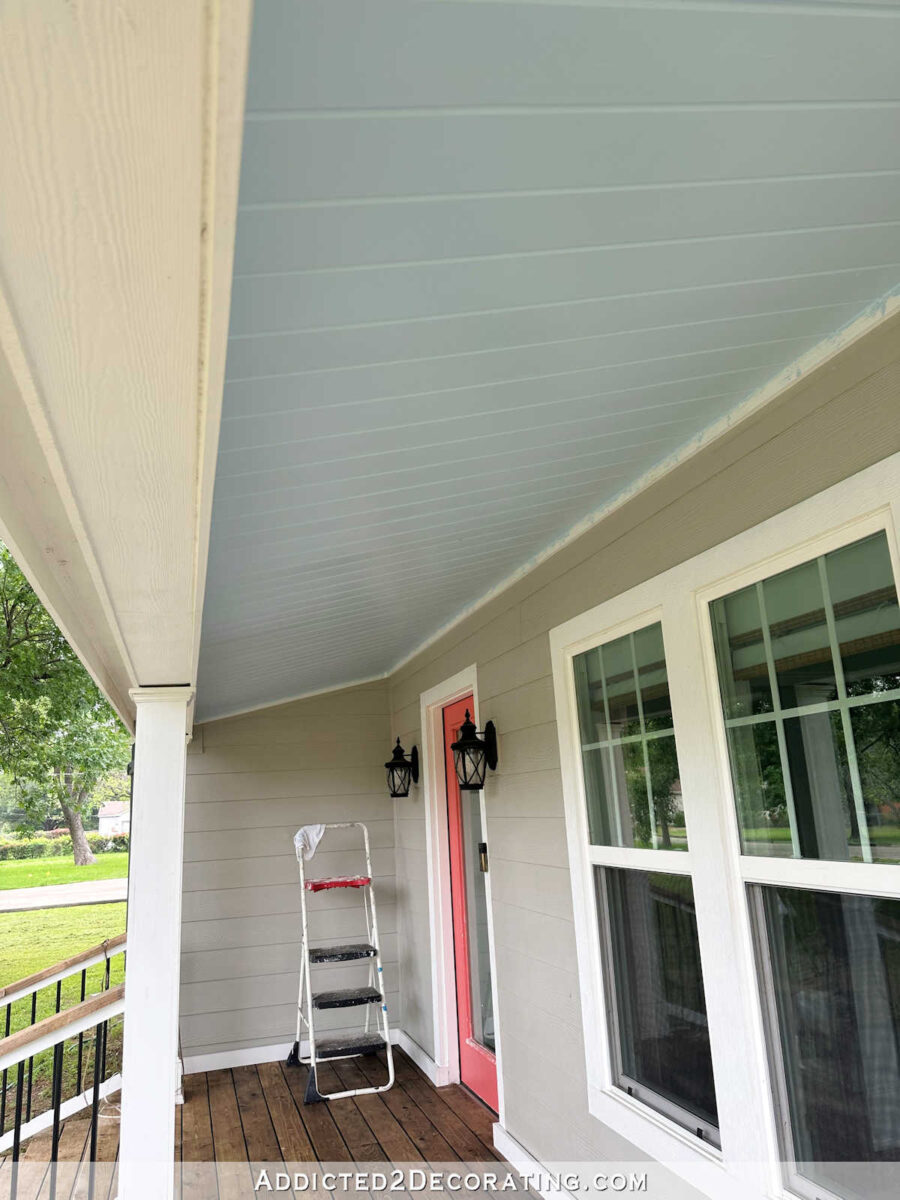
So I extremely advocate it when portray wooden that has by no means been primed and painted earlier than, or when attempting to cowl knots, stains, and many others. I additionally used it on the studio ground earlier than I painted it, and the ground, though it’s very soiled and dusty and in determined want of a very good scrubbing, is holding up amazingly effectively.
Anyway, I did issues in a unique order this time than I often do. My regular order is to wooden fill, sand the wooden filler, after which caulk. As soon as the caulk is dry, then I prime, sand, and paint. However this time, I made a decision to wooden fill, sand, after which prime earlier than caulking.
This order really helps to spotlight these areas that want caulk. After I caulk earlier than priming, I usually see areas that I missed as a result of they had been more durable to see. However once I prime earlier than caulking, it’s exhausting to overlook these areas that want caulk. They stick out like a sore thumb.

When the primer is a vivid, clear white, these cracks that want caulk are exhausting to overlook.

However the principle purpose that I did it on this order this time is as a result of the plywood I purchased was very tough. Have any of you observed a really noticeable lower within the high quality of plywood from Residence Depot and Lowe’s currently? I positive have. I purchased the identical sanded plywood that I at all times purchase for constructing cupboards and furnishings, and but, this wasn’t sanded as easily as what I’m used to.
So I used to be involved that if I put caulk over that naked, tough wooden, the moist caulk would seize onto that tough wooden, and I’d have an actual problem getting a easy caulk end. And primed wooden is a lot simpler to sand easy than unfinished wooden. So I made a decision to prime first, sand the primer easy (by hand utilizing 220-grit sandpaper), after which caulk. I believe I’ll find yourself with a significantly better end this manner.
Whereas I’ve gone over this info earlier than, I do need to make clear once I use wooden filler, and once I use caulk. It’s quite simple. If I’m desirous to create a seamless, very easy floor, I take advantage of wooden filler. For instance, this space the place the entrance trim piece attaches to the aspect plywood piece had a small crack between the 2 items. I crammed it with wooden filler, after which used my electrical sander with 120-grit sanding discs to sand it completely easy. Now that it’s primed, it appears to be like easy and seamless.

Right here you’ll be able to see the identical factor on the surface panel. The place that entrance trim meets the aspect plywood, it appears to be like seamless. That’s from utilizing wooden filler, after which sanding it completely easy earlier than priming, as a result of it actually wasn’t seamless earlier than the wooden filler and sanding.

I additionally fill nail holes with wooden filler in order that they are often sanded completely easy as effectively.
Caulk, alternatively, is used to fill areas that don’t should be a easy, flat floor. Anyplace the place there’s a change in aircraft, like the place the trim meets the cupboard field, or one trim meets one other trim, these areas are stuffed with caulk.

I do have an exception to that rule on this cupboard. This space the place the tall aspect cupboards meet the quick center cupboards, there are two items of trim that meet on the identical aircraft.

Nevertheless, I’m going to make use of caulk right here as a result of I don’t essentially need or want these to prove wanting completely easy and seamless. I’m okay with them wanting like two separate items, however I simply don’t need that deep crack there.
In order that’s my basic rule for deciding the place to make use of wooden filler and when to make use of caulk. If I need to find yourself with a superbly easy floor, I take advantage of wooden filler as a result of it may be sanded to a easy, flawless end. If I’m simply filling cracks between two items (and 99.89% of the time, these two items will meet at totally different planes), I take advantage of caulk.
That’s the progress, and I’m actually hoping that this can lastly be the day I can really get some colour on these cupboards. I’m so anxious to see pink cupboards on this nook of the room!!


Addicted 2 Adorning is the place I share my DIY and adorning journey as I rework and enhance the 1948 fixer higher that my husband, Matt, and I purchased in 2013. Matt has M.S. and is unable to do bodily work, so I do nearly all of the work on the home on my own. You can learn more about me here.
Trending Merchandise


